[GUIDE] How to Create Labels Using Microsoft Word | Make Label Templates Using Word
Автор: The Monkey Archive
Загружено: 2023-05-03
Просмотров: 435
Описание:
Please leave a Comment & Like Reaction if it works for you! . . SUBSCRIBE!
[GUIDE] How to Create Labels Using Microsoft Word | Make Label Templates Using Word
========================
INFO:
How To Make Label Templates Using Word's Create Labels Tool
Template Tuesday Presents...how to create your own label templates in Word, using Word’s Create Labels tool.
Please note: this method is NOT suitable if your A4 labels have gaps between the rows and/or columns that measure less than 4.2mm.
CREATE LABELS – STEP 1: Start The Create Labels tool
Open a blank document in Word, click on the “Mailings” tab at the top of the page, and click on “Labels”. This will open a box titled “Envelopes and Labels”. Click on the “Options” button to create a new label template. This opens another box titled “Label Options”. Click on “New Label”, which opens a further box titled “Label Details”.
CREATE LABELS – STEP 2: Enter The Measurements Of Your A4 Labels
Fill in each of the required fields. You will need to know the following information about your A4 labels:
Top & Side Margins
Label Width & Label Height
No. of Blank Labels Across & No. of Blank Labels Down
Vertical Pitch & Horizontal Pitch
This seems simple enough, right? Well, yes and no. Word does have a tendency to be extremely picky about how you use its built in tools so we recommend following these TOP TIPS to make sure your measurements measure up to Word’s expectations.
Create Labels – Order Your Measurements Carefully
While you’d assume you could just start filling in the measurements in the order in which they are listed, Word will sometimes start to automatically correct your measurements before you’ve finished adjusting all of the fields – and other times it will reject your measurements when you try to create your label template.
We recommend using this order:
Page Size: set the page to A4 and DOUBLE CHECK the measurements are 210mm wide by 297mm high. To create a landscape template, select A4 landscape, which is the next option down.
No. of Labels: enter the number of labels across and the number of labels down.
Label Width & Label Height: enter the measurements of each blank label. If you are creating a label template for round labels, enter the diameter of each circular label for both the width and height.
Vertical Pitch & Horizontal Pitch: the vertical pitch indicates the height of each label plus any gap between each row of labels and the horizontal pitch indicates the width of each label plus any gap between each column of labels. If there are no gaps, the vertical pitch will be the same as the height and the horizontal pitch will be the same as the width.
Top Margin & Side Margin: enter the top and left margins for your A4 labels. If you find that Word disagrees with your measurements, try reducing the margins to 0mm before you enter the rest of your measurements.
Create Labels – Format Your Measurements Carefully
You also need to be careful as to how you enter the measurements. All of your measurements (except for number across and number down) must be expressed as a value, followed by a single blank space, and then the unit symbol for the measurement being used. In other words, if the label width is 70mm you MUST enter this as 70 mm.
If Word is set up to use centimetres as the default measurement you can EITHER divide the measurements by 10 to convert millimetres into centimetres OR you can change the default measurement to millimetres.
Word: click on File - Options - Advanced – scroll down to the Display section and choose your preferred unit of measurement from the “Show Measurements in units of” drop down list.
Word For Mac: click on “Word” in the menu bar at the top of your screen, and select “Preferences”; in the Word Preferences box, select “General” from the Authoring & Proofing Tools Section, and then select your preferred unit of measurement from the “Measurement units” drop down list.
At Label Planet, we provide detailed measurements for all of our label sizes on our Template Information Pages. To find the label template information for a particular label size you can either go through our Label Templates home page (select your label shape and then your label size) or visit the product page of your label size and click on the purple “Label Templates and Printing Information” link.
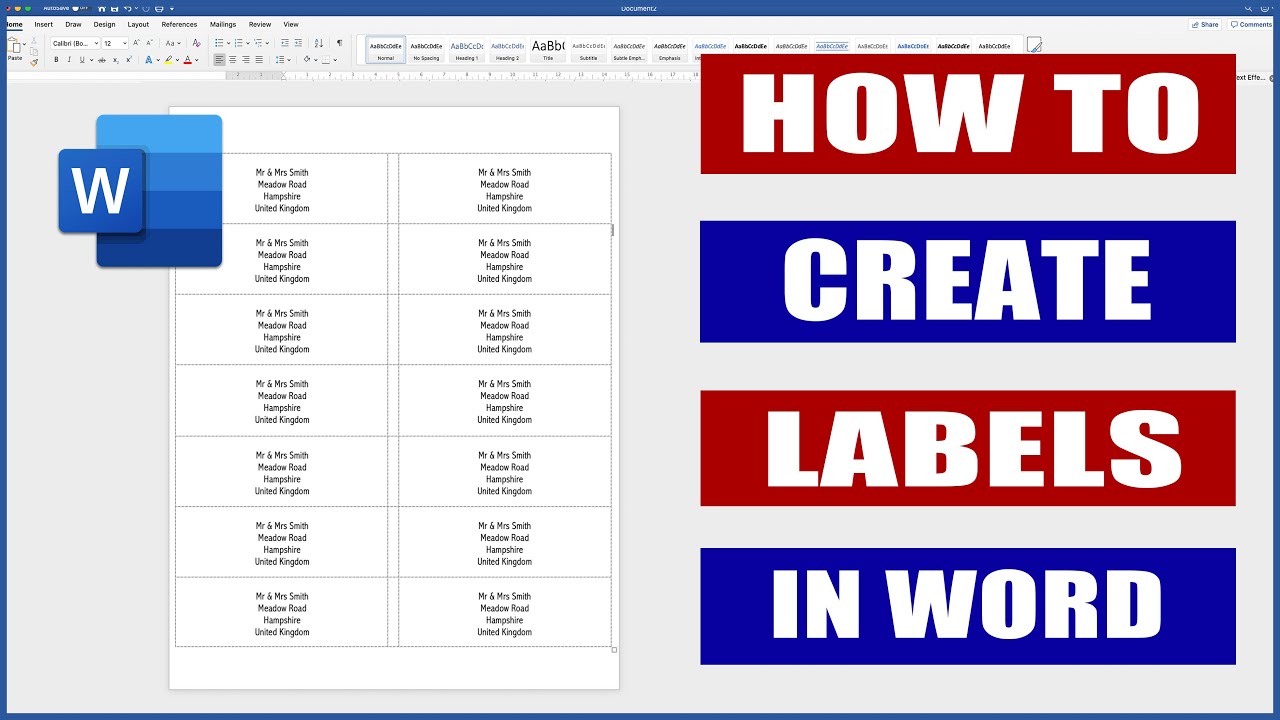
CREATE LABELS – STEP 3: Open Your New Label Template
Give your label template a name and then click “OK”. You will be returned to the “Label Options” box where you should click “OK”. You will be returned to the “Envelopes and Labels” box where you should click “New Document”.
This opens a new document containing your label template. In Word, label templates are made using a table where the cells of the table represent your blank labels (and any gaps between them). Word label templates, therefore, cannot show any shaping on rectangular labels and square labels (such as rounded corners) and cannot show the outline of round labels and oval labels.
Повторяем попытку...
![[GUIDE] How to Create Labels Using Microsoft Word | Make Label Templates Using Word](https://imager.clipsaver.ru/LbpMyBFChKM/max.jpg)
Доступные форматы для скачивания:
Скачать видео
-
Информация по загрузке: