Bombatura fondo - Lavorazione a pialletto (versione corta)
Автор: Davide Sora
Загружено: 2015-01-23
Просмотров: 18576
Описание:
Lavorazione a pialletto con lama dentata, seguente alla scultura a sgorbia.
ENGLISH TRANSLATION of the written notes in the video, in order of appearance :
0' 04" - Back arching - Fingerplane working
0' 08" - At this point the arching shows the signs of the previous gouge sculpture, wich must be eliminated to obtain a more continuous and uniform surface
0' 15" - Use a brass fingerplane with curved sole and with toothed blade 13 mm wide
0' 27" - Distribute strokes evenly on the surface, removing the least enough to completely eliminate the signs of the gouge
0' 47" - Get closer also to the purfling, but always pay attention not to touch it, being the thickness at that point already very close to the final measure
1' 02" - Always respect the central area of the sixth (the long arch), getting closer to the center line without touching it
1' 25" - Cover small areas with strokes in the same direction to better visualize the surface
1' 31" - Make subsequent passes crossing the direction of the strokes, to better understand where you are removing
1' 48" - Be careful not to dig too deeply in the channel of C- bouts, maintaining the curve of the central fifth fairly full (convex) up to the proximity of the purfling
2' 06" - Make, conversely, a fairly wide recurve near the corners at the blocks, to give greater elasticity to these parts in itself very stiff
2' 44" - Remove at the center line only at the upper and lower blocks, to obtain a uniform recurve along the entire perimeter of the edges
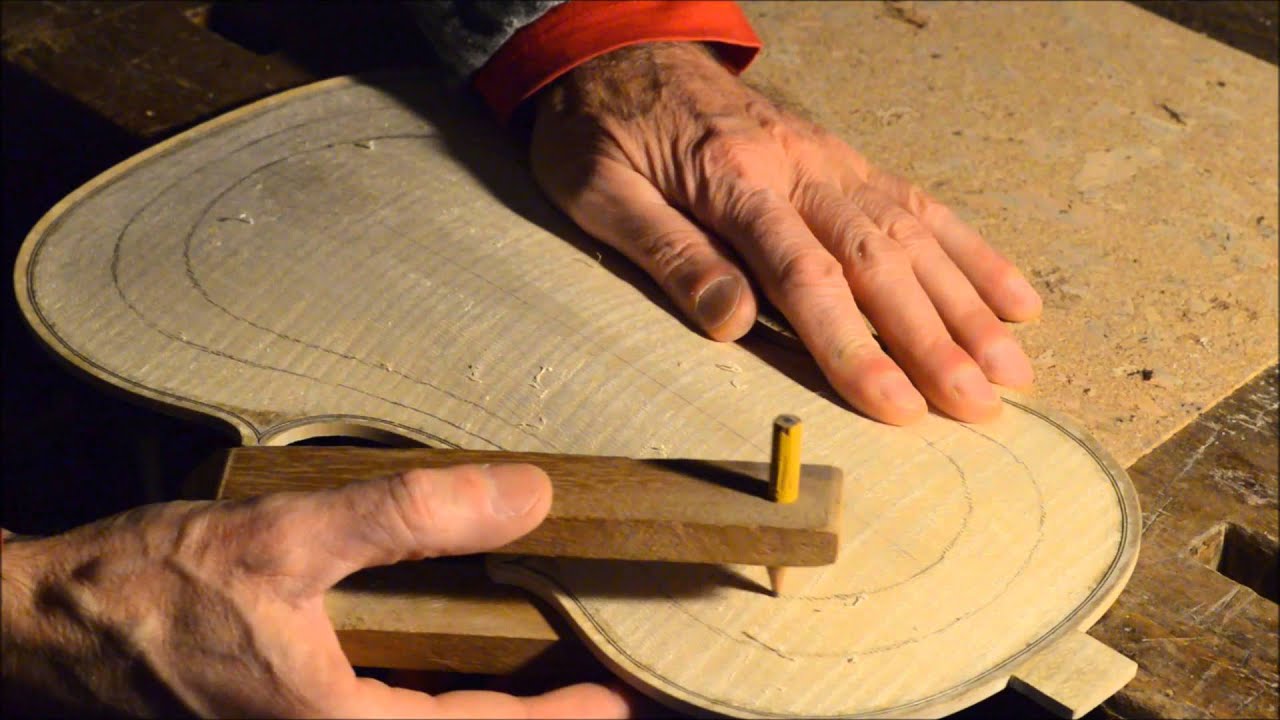
2' 50" - With the help of special marking tools (each set to a fixed measure) draw the contour lines to assess the shape and symmetry of the curves
3' 43" - Use a profilometer to detect the fifths shape at predefined positions (center, upper and lower bouts maximum width, minimum width at upper and lower corners)
3' 47" - Compare with some reference fifths, evaluating the changes to be done to get the desired shape
4' 04" - Correct the various asymmetries and irregularities of the contour lines starting from the recurve area
4' 11" - Use the sensitivity of the fingers to perceive and compare volumes and curves
4' 42" - Feel by touch any angularities and discontinuities in the convex parts and at the points of transition between concave and convex, eliminating them carefully harmonizing curves
5' 29" - Re-trace the contour lines to see what has changed, until the desired shapes and symmetry will be achieved
5' 43" - Estimate by eye the arching shape, observing the curves and volumes against a dark background and reading the shadows cast by the light
5' 58" - Check the heights of the sixth in the areas that have been modified (recurve area) making sure that they are still abundant of a pair of tenths compared to the final measures
6' 12" - The central part of the sixth has not been touched by the toothed fingerplane and is still abundant of about 0.5 mm
6' 19" - With special templates shaped as an arc of a circle verify that the minimum radius of curvature of the central part of the arching is the right one
6' 29" - Throughout the process also use the shadow cast by a straight ruler to better visualize the curves
Index of videos : www.davidesora.altervista.org/videos/
Повторяем попытку...
Доступные форматы для скачивания:
Скачать видео
-
Информация по загрузке: