Step-by-step epoxy resin processWatch till the end — the result is worth it
Автор: Resin OK decor
Загружено: 2026-01-19
Просмотров: 16
Описание:
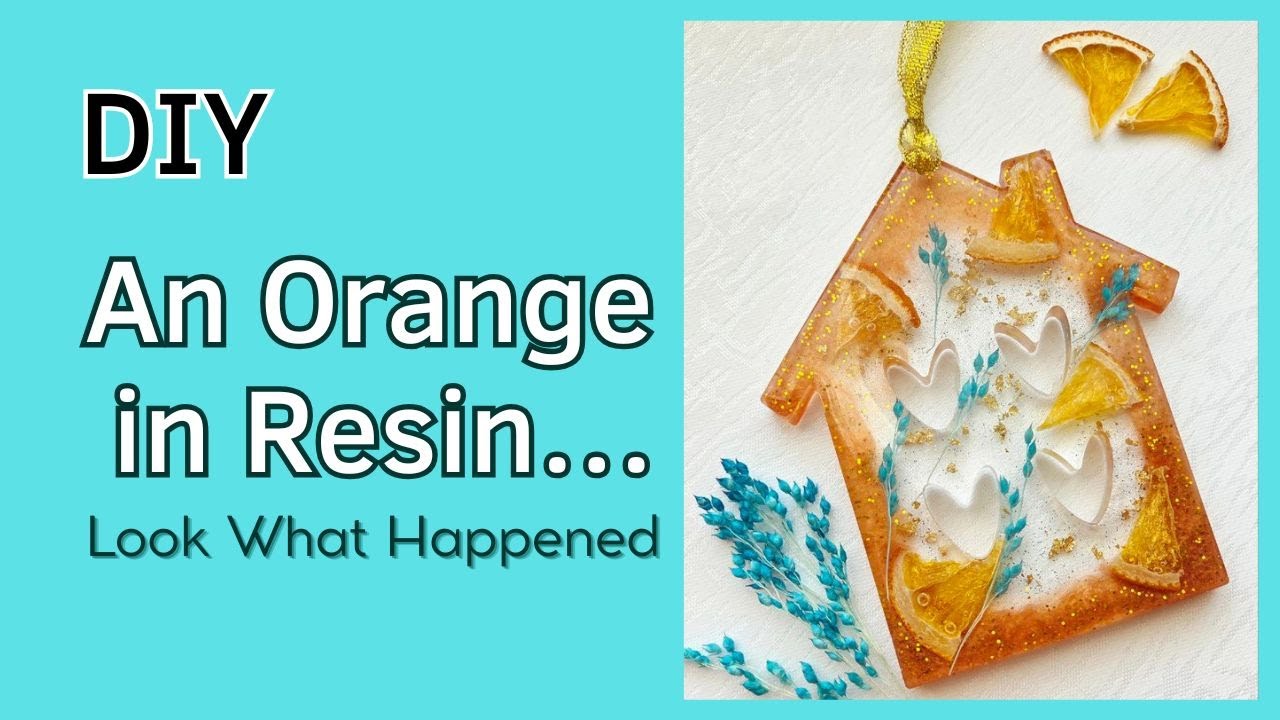
This video shows a step-by-step DIY process of creating a beautiful home decor piece using epoxy resin and natural materials.
I’m making a house-shaped resin decor piece, carefully layering clear and pigmented epoxy resin to achieve a clean, aesthetic result. The design includes natural dried orange slices, decorative dried grass, gold accents, glitter, and delicate details that add warmth and character to the piece.
The process begins with mixing the required amount of epoxy resin and pouring a thin base layer into the mold. I evenly spread the resin to avoid empty spots and remove air bubbles using a torch. Once the base is ready, I carefully place the dried orange pieces, which are lightly coated with gold paint, along with decorative dried grass in turquoise tones.
After curing for 24 hours, I move on to the next resin layer. This layer includes glitter, gold leaf, and pearl pigments to create depth and highlight the edges while keeping the center transparent. The resin is poured slowly and precisely, layer by layer, to maintain control over the design and composition.
Once fully cured, the piece is carefully removed from the mold. A final resin coat is applied to the front surface to create a smooth, glossy finish. This step requires patience and attention to detail to avoid imperfections.
The result is a unique, original, and aesthetic handmade decor item that can be used as home decor or a decorative ornament. This project is perfect for anyone interested in DIY resin art, epoxy resin tutorials, handmade decor, and slow, satisfying creative processes.
Повторяем попытку...
Доступные форматы для скачивания:
Скачать видео
-
Информация по загрузке:


![♻️Дизайнерское зеркало. Имитация керамики из картона [diy]](https://image.4k-video.ru/id-video/qjBGkMtL5BI)


