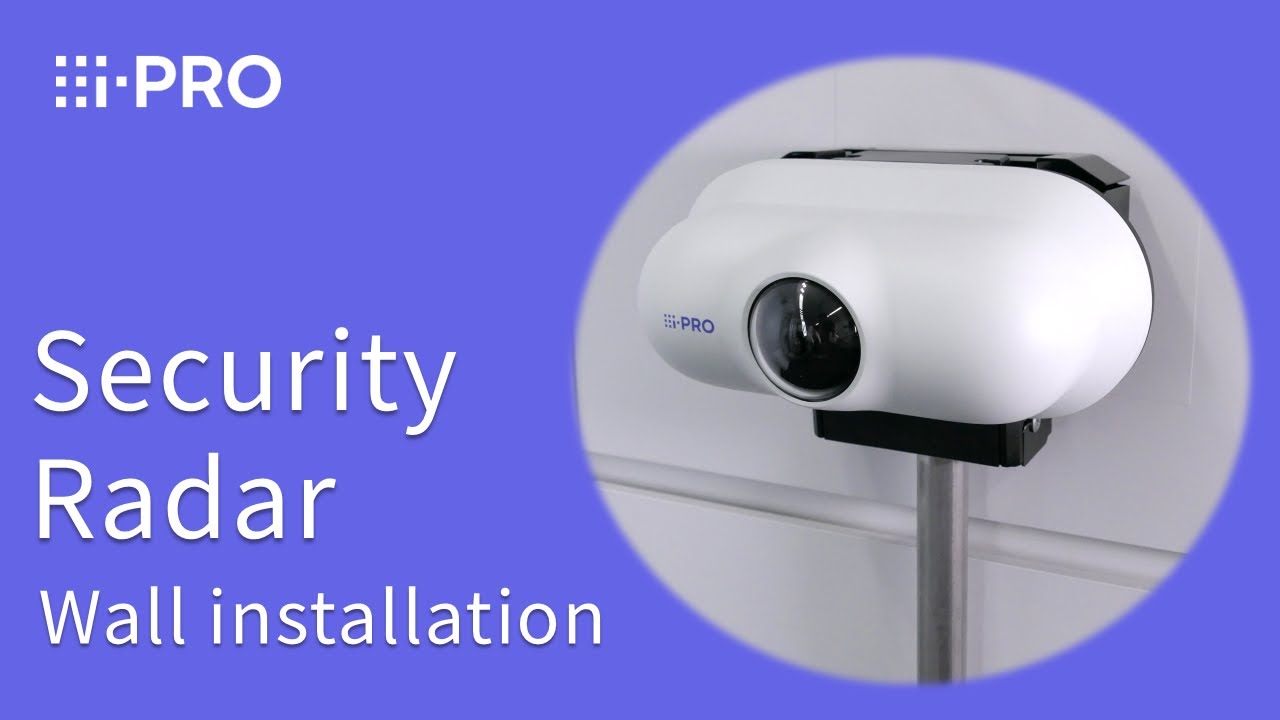
i-PRO Security Radar - Wall installation
Автор: i-PRO Technical Support
Загружено: 2026-01-19
Просмотров: 81
Описание:
This video provides a step-by-step guide to installing the i-PRO Security Radar (WV-RD5500 series) on a wall. You'll learn tips for successful installation.
Ideal for customers considering our radar solutions or preparing for installation.
👉For best results, please watch together with our unboxing video. • Unboxing of i-PRO Security Radar
⏱Timestamps:
00:00 Opening and Product Features
01:47 Standard accessories and locally procured items
-- Preparation --
01:56 Remove TILT fixing screws
02:09 Separate unit and mount base bracket
02:53 Parts & Insert SD card
03:16 Attach the conduit to base bracket
-- Installation --
03:28 Install mount base bracket
03:43 Attach unit
04:02 Detach rear cover
04:19 Secure ground wire
04:25 Connect RJ45 Ethernet cable
05:24 Secure unit and adjust TILT angle
-- After Installation --
05:58 Check Radar Detection and Coverage with Built-in camera via USB Wi-Fi dongle
📌 Products featured in this video
・WV-RD5500-C (Available in the U.S. and Canada)
・WV-RD5500-CE (Available in Vietnam and New Zealand)
・WV-RD5500-CS (Available in the U.S. and Canada)
・WV-RD5500-CSE (Available in Vietnam and New Zealand)
Learn more about i-PRO Security Radar on our website: https://i-pro.com/products_and_soluti...
-Promotion Video: • i-PRO Security Radar
-Product page: https://i-pro.com/products_and_soluti...
https://i-pro.com/products_and_soluti...
🔗Useful Links
*System Setup & Design Tools*
Setup tool "i-PRO configuration tool": https://i-pro.com/products_and_soluti...
System Design tool: https://i-pro.com/products_and_soluti...
*Product Selection, Documentation & Support*
Product Selector: https://i-pro.com/selector/product/
Documentation Database: https://i-pro.com/products_and_soluti...
-FAQ & Technical Library: https://i-pro.com/products_and_soluti...
📌Technical Support Videos(YouTube): / @i-protech
✅Subscribe for more installation guides and product updates!
00:00 Opening and Product Features
01:47 Standard accessories and locally procured items
02:00 Remove TILT fixing screws
02:12 Separate unit and mount base bracket
02:37 Attach I/O cable
03:49 Parts & Insert SD card
04:13 Attach the conduit to base bracket
04:21 Install mount base bracket
05:12 Attach unit
05:31 Detach rear cover
05:49 Secure ground wire
06:00 Connect RJ45 Ethernet cable
07:04 Secure unit and adjust TILT angle
07:43 Check radar detection and coverage via built-in camera (USB Wi-Fi dongle)
Повторяем попытку...
Доступные форматы для скачивания:
Скачать видео
-
Информация по загрузке: