Gretsch Guitar Build Project - Ep 05
Автор: the Next Project
Загружено: 2022-04-08
Просмотров: 3340
Описание:
Welcome to the Next Project, Gretsch inspired guitar build project.
00:00 - lights, camera, action
00:04 - intro
00:34 - lumber prep
02:21 - neck layout and…?
03:01 - the cutting begins
03:09 - the trussrod trench
03:39 - rough tenon
04:38 - rough cut the neck
05:35 - the next contraption
06:34 - take a look
07:19 - first run
08:43 - crazy little thing called fingerboard
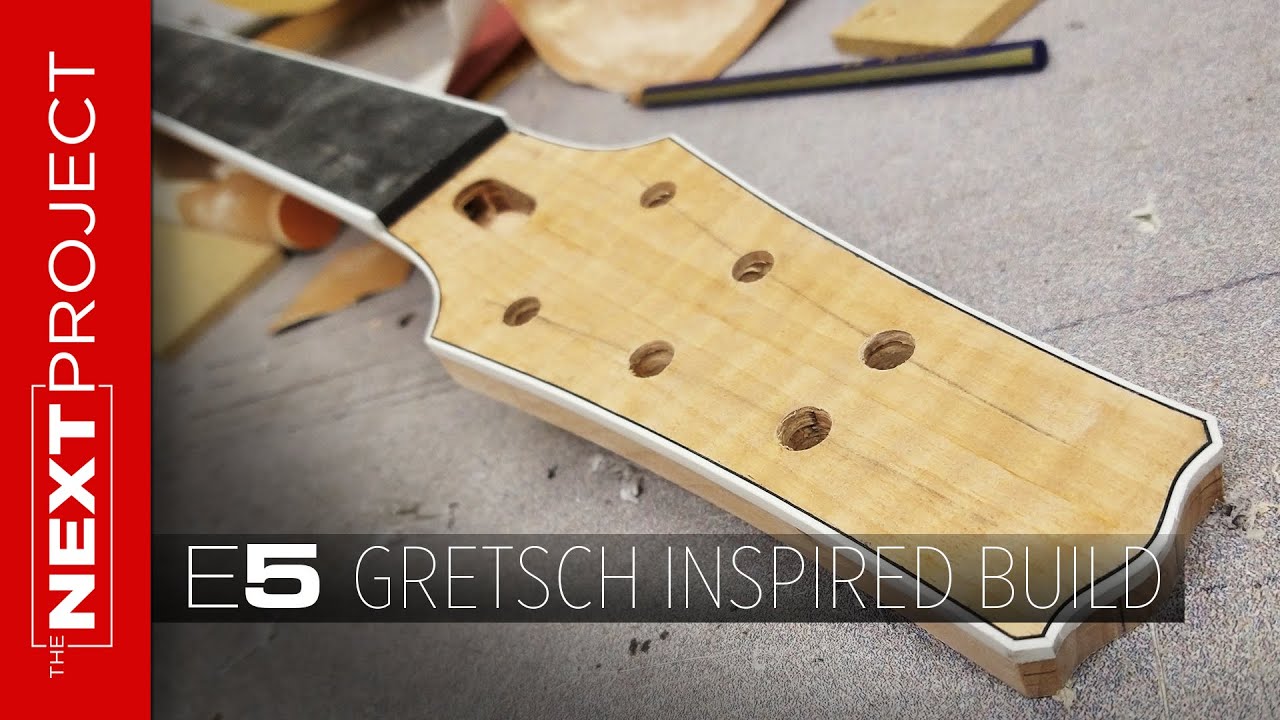
09:49 - head stocking
10:58 - in a bind
11:44 - rubber band blunder
13:22 - time to shape up
14:45 - takeaway
==
As mentioned in the video, here are a few links to ideas that spurred the drill press over arm router fixture.
Ryan Martain (YouTube) #29- Ryan Martian's Neck Carving Jig
• #29- Ryan Martian's Neck Carving Jig
J-Bird Customs (YouTube) DIY Overhead Router Build! Simple design!
Here is a link to a great re-invention of what I was doing, all inspired by a photo he saw.
• DIY Overhead Router Build! Simple design!
Luthier Talk
https://www.luthiertalk.com/threads/r...
And many other ideas along the way.
==
The neck started life as a maple tree (hard maple) or some sort, then there is a little walnut thrown in for visual favor.
The maple blank is/was a 3"x3"x36" turning blank. I chunk of lumber prepped for people who turn baseball bats and such. I sliced the blank into pieces, rearranged them to help stabilize their future life together then off to the sander to make them uniform.
I have a homemade drum sander that I used to remove the bandsaw blade marks and to level and make them ready for glue up.
I used Titebond original wood glue for the job, adding the walnut veneer layers into the mix. I nice look should emerge. Lots of clamps were used and everything was clamped to my bench to help stabilize during glue cure.
What happened next, let's see. Oh, the neck blank then needed to be squared up, so I ran it over a homemade jointer a few times to level out the edges and make it workable. A pretty quick job luckily.
Now it was time for "layout" planning, and I took my time to help ensure I didn't make math errors, nor draw lines in the wrong place, nor whatever else I typically do wrong. I did have to erase a few lines, change some dimensions.... it's good to verify measurements, question decisions... All went well, but I had a gut feeling something could be wrong.
Time to start cutting. First I lopped off the excess material getting the blank closer to final length.
Then a truss rod channel was cut in using a router. This plan changed right up to the last minute, as I've cut channels a number of different ways, all work well, but I went this route today.
Then on to cutting and routing away material to reveal the neck tenon. I knew it was in there somewhere!
More cutting on the bandsaw to reveal the rough neck shape. It was hiding in the neck blank with the tenon, I guess that is logical.
I cleaned up the neck taper across the fingerboard area using a compression router bit. This bit is amazing at creating smooth cuts, but it comes at a price. We won't talk about that.
Time to introduce a new fixture to the family. I've been working on a neck radius thingy for some time. It draws inspiration from a lot of different places, but basically cradles the router so the bit hangs down. Basically and overarm pin router on a budget. The neck blank gets clamped to a template that slides beneath the router, and a 7/8" round-over bit with a guide bearing cuts away excess lumber pretty quickly.
Switching to other parts of the neck, I ran a richlite fingerboard across my table saw 24, or 25 times cutting fret slots. This was followed by another router fixture process to radius the fingerboard.
Afterwhich I added binding and 12th fret face marker dots. the fingerboard was now ready for the neck.
But the neck needed some headstock work done first. I glued on headstock wings, ears, extensions... Followed by planing the headstock to thickness, routing a truss rod access point, glued on a face veneer then cutting it to shape. Hmm, not done with it yet. I routed a ledge for binding, then fought with the powers that be to get the binding in place. It went well, but was a bit of a battle.
Only a few words left. The fingerboard was glued to the neck. A small blunder dawned on me a few hours later...I had left the protective tape over the truss rod channel. Oh well, world kept spinning.
The neck was now ready for final rough shaping. A shinto rasp and a cheap Amazon dragon file (rasp) were used to get the neck shape knocked down to where sandpaper could be used.
And I'm outta word count, sorry!
Thanks for hanging with me on this, we will get there!
Be safe and take care!
#GGBO #greatguitarbuildoff #gretsch
Повторяем попытку...
Доступные форматы для скачивания:
Скачать видео
-
Информация по загрузке: