How to Install 2X Fits American Standard® Champion® 4 and Eljer® Titan® 4 Toilet Flush Valve Seal
Автор: Korky Toilet Repair
Загружено: 2024-06-04
Просмотров: 21776
Описание:
This video will show you how to install 2X Fits American Standard® Champion® 4 and Eljer® Titan® 4 Toilet Flush Valve Seal
https://www.korky.com/parts/flapper-s...
0:00 Introduction
0:28 How to install with wing-nut
1:54 How to install without a wing-nut
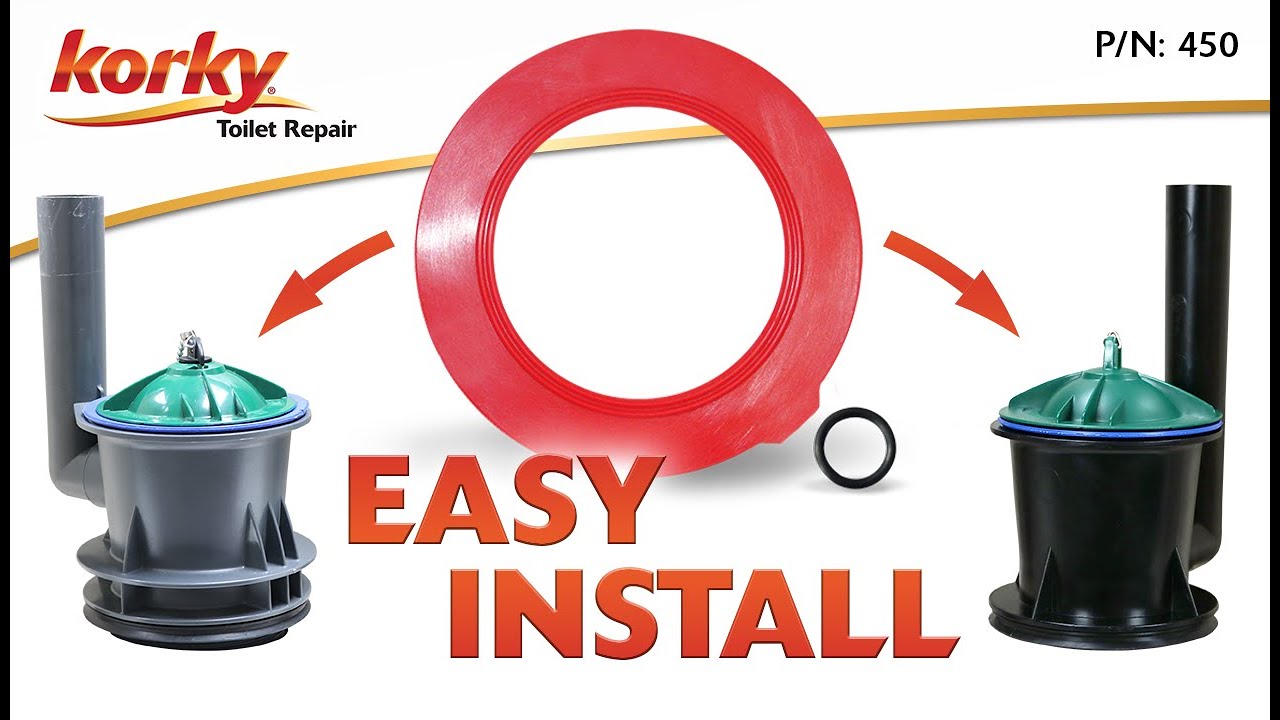
There are two types of flush valve assemblies, those with black wing nuts at the top, and those without. If your flush valve has a black wing nut, follow these instructions. Otherwise skip ahead to the time stamp.
The first step is to to turn the water supply off and flush to drain the tank detach the flush lever chain from the flush lever arm. Next, unscrew the black nut and remove it remove the O-ring using your finger nail or tweezers and replace it with the black o-ring. Remove the green cover and replace the old seal. Take wet rag and gently wipe the sealing surface of the flush valve to remove any debris. While you lift up on the bottom of the cup, place the green cover on and twist until nested.
Screw the black nut back on until you hear one soft click and two loud clicks, and fit it into the placeholders. Be sure not to overtighten the nut or it may snap off. Reattach the chain to the flush lever arm. Finally, turn the water supply back on and enjoy a smooth running toilet without any leaks. To learn more click here or visit Korky.com/toilet-genius. Still have questions? Our technical support team is always willing to help.
If your flush valve does not have a black wing nut follow these instructions. Begin by turning off the toilet's water supply. Then flush the toilet to drain the tank of water. Next, detach the flush lever chain from the flush lever arm. Lift the valve's upper assembly and twist the interior rod clockwise to remove it. Twist the lower cup clockwise to remove it from the upper assembly. Remove the old seal and replace it with a Korky long-lasting replacement seal. Now snap the lid and lower cup together by aligning the tab and the slot on the side of the assembly.
Take a wet rag and gently wipe the sealing surface of the flush valve to remove any debris. Twist the upper assembly clockwise back onto the interior rod and reattach the chain to the flush lever arm. Finally, turn the water supply back on and enjoy a smooth running toilet without any leaks.
To learn more, click here or visit Korky.com/toilet-genius. Still have questions? Our technical support team is always willing to help.
Повторяем попытку...
Доступные форматы для скачивания:
Скачать видео
-
Информация по загрузке: