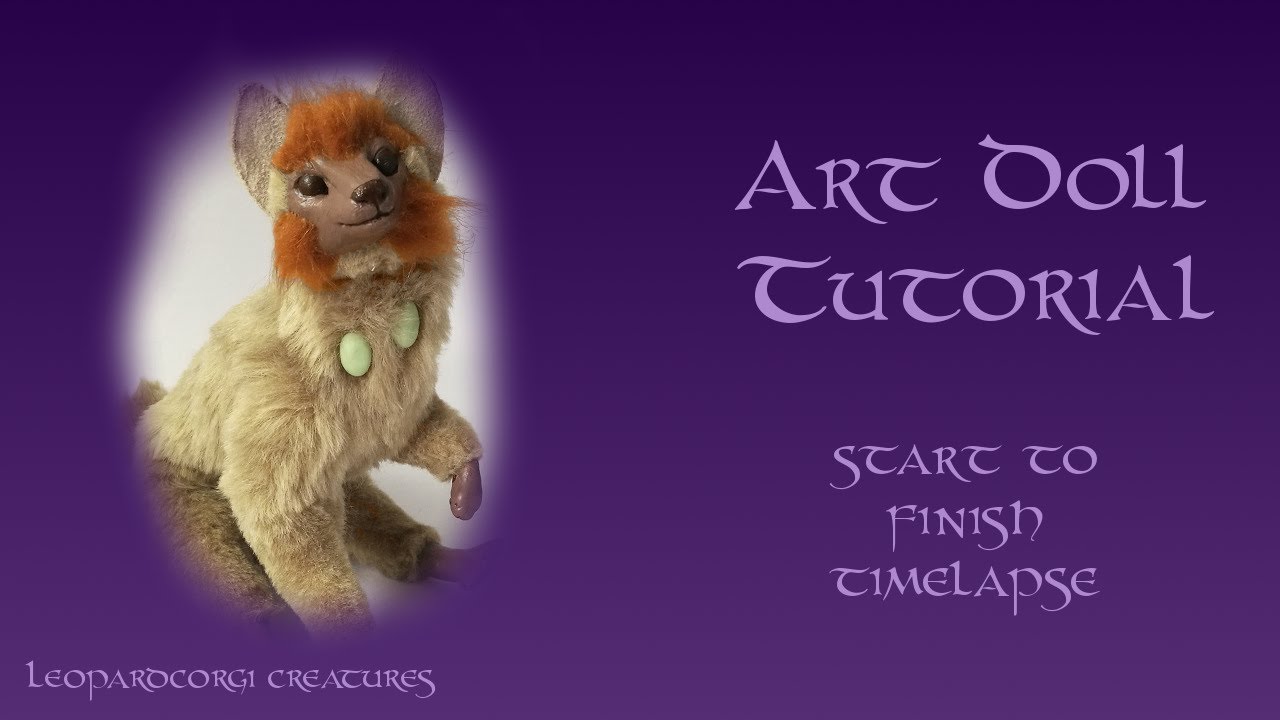
Art Doll Tutorial - Start to Finish Timelapse - Tata, the Trickster God of Niche
Автор: J S
Загружено: 2018-03-28
Просмотров: 7956
Описание:
Have a question about how/why I did something? Check below, it's probably answered there!
Here is the start to finish creation of Tata, the trickster god from Seri's playthrough of the biology based game Niche.
Etsy store: https://www.etsy.com/uk/shop/LCCreatures
Leopardcorgi Creatures website - gallery, commission info, and more: http://leopardcorgi.co.uk/
Seri's channel: / @seripixelbiologist
Niche: https://niche-game.com/
Music by http://www.purple-planet.com/
Creating the armature:
I add extra wire wrapped around the main frame as this creates a surface for the quit batting to grip to when I build up the body later. This prevents it from sliding off the armature as I work.
Sculpting head and feet:
These are all Super Sculpey Living Doll over aluminium foil, which helps to cut down weight. Tools used are a pair of silicone tipped shapers. You can find these at art supply stores alongside the paintbrushes. They are useful for blending clay and adding detail. You can use other items if you prefer - you can go far with just some toothpicks if that's all you have. You may use any clay you wish but it MUST be something that will harden. Alternate brands of polymer clay (Fimo etc) are just fine. I don't know about other types so if you use those you will have to do some experimenting and seeing what works.
Attaching parts to the armature:
In the linked video I use epoxy putty, here I am using hot glue, which works about the same and is effective on smaller dolls like this one. It's your choice what you use.
Painting:
I am using acrylic paints. The ones sold in small bottles are best - paint in tubes is more expensive and better suited to painting on canvas, but you can still use it effectively. Other types of paint (e.g. watercolour) are not suitable as they won't stick properly to the clay. After painting I use a clear sealant (here mod podge and clear gloss varnish on the eyes and nose, but you can use whichever type you wish) to prevent chipping. You don't have to paint at this stage, but I prefer it here as the paint doesn't get matted with fibres from the fabrics used later. It's up to you what works best for you.
Bulking up the body:
As usual I'm using strips of quilt batting wrapped around the armature and shaped using felting needles.
Creating a pattern:
Using cling film and tape to create a shell around the body which is cut out and flattened to make a close fitting sewing pattern. I normally use duct tape as it sticks well and is strong. Here I experimented with masking tape but I found it didn't stick to itself and kept peeling, so I added some brown packing tape to keep it down. This worked ok but I would still recommend duct tape. Note that brown packing tape alone isn't thick enough to properly hold a shape so I would not use that either. Try experimenting anyway and see what works for you. Note that whilst I normally do the pattern on one side only because it can be flipped, in this case the character has asymmetric front limbs so I had to make a pattern for both sides of the upper body.
Cutting out and sewing up the fur:
Quite self explanatory, pin to the fur, cut out, and sew back together. To sew up the fur I'm using a backstitch. I usually hand sew as here because the pieces are rather small and have some complicated turns that would make using a sewing machine difficult. When cutting fur, you need to be careful to not slice through the pile. I make small snips with the scissors and try to slide the blades through the pile so that I'm only cutting the backing.
Attaching fur to the body:
The completed "pelt" is draped over the body and closed up along the belly and inner legs with a slip stitch to hide the seams (link - not my tutorial). I trim away any excess fabric on the limbs and comb the whole thing over with a teasel brush to free any pile caught up in the seams. After that I use hot glue to stick the open ends to the clay.
Flocking:
I don't do much flocking on this doll as he has a sculpted face and paws, but I add some to the edges of the face to build up his mane and also to help hide the seams around the feet.
Trimming:
Once he is all put together I trim the fur with scissors around the legs and face to sculpt the body shape and make him look more realistic.
Gems:
They are simple shapes rolled up, baked, and glued onto the chest with hot glue. I cut away some of the fur underneath so the gem is properly in place and glued to the backing. Now he's all done!
Повторяем попытку...
Доступные форматы для скачивания:
Скачать видео
-
Информация по загрузке: