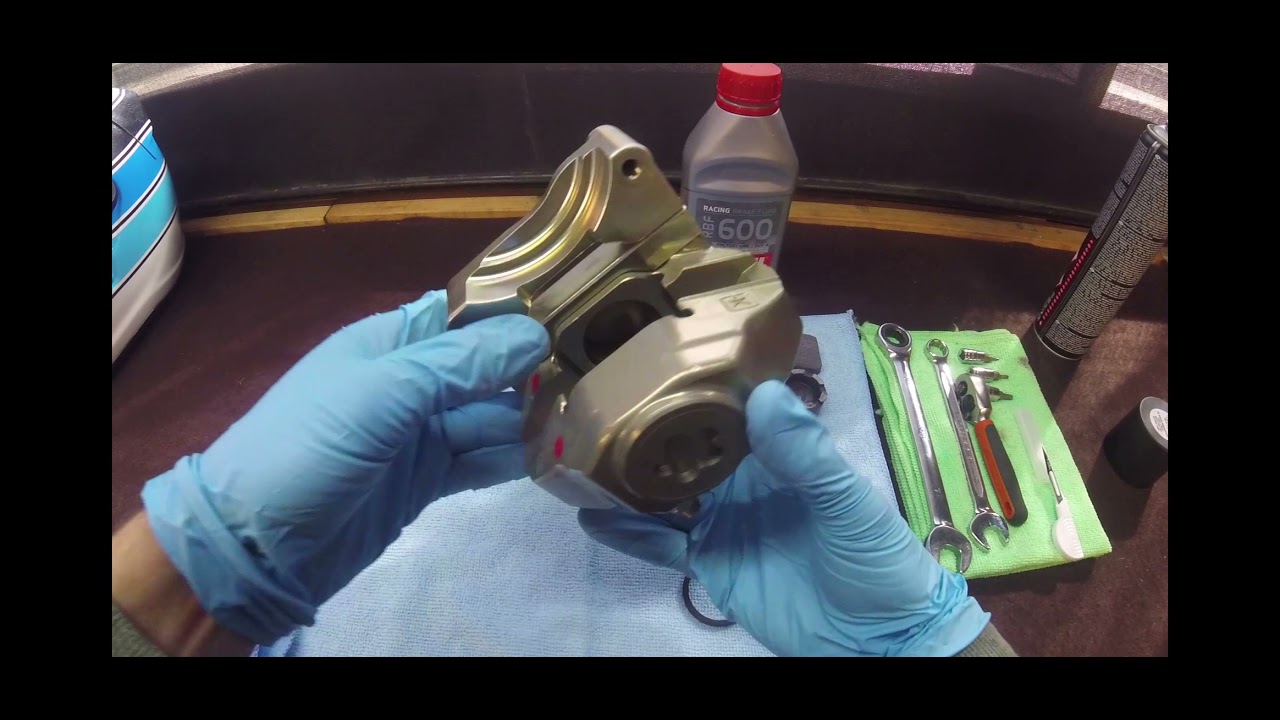
OTK Tony Kart BSD brake caliper rebuild and brake bleed
Автор: Dan Bloxham
Загружено: 2021-04-22
Просмотров: 6048
Описание:
Tools required:
14mm spanner
13mm spanner
8mm spanner
4mm allen key
2mm allen key
Pick, knife or and other object you're comfortable using to remove the seals.
Gloves
fuel line
1. Using the 13mm spanner, remove the two bolts holding the caliper to the bearing hanger and pull the caliper clear of the rotor.
2. Pump the brake pedal untill the pistons are pushed clear of the caliper, use a rag to soak excess brake fluid.
3. Use the 14mm spanner to remove both brake lines from the caliper.
4. Use the sharp object to remove the seals, be careful not to scratch or damage the inside of the caliper where the piston will sit. This could cause leaks and a loss of pedal pressure on the track.
5. Install the new seals by hand, they will snap in place easily and check they are seated fully.
6. Pour some of your chosen brake fluid into the bottle cap, with gloves hands wipe the piston and seal in a good amount of brake fluid.
7. Press the piston into the caliper untill it's fully seated. repeat for the other side. The second side was tricky so I wrapped a rag around a snapper, fed it through the caliper and used it to press the piston into the caliper with more force.
8. Seat your pads into the caliper.
9. Place the retaining pin through one side of the caliper and pad, slide the safety bush on the pin so stop the pin falling out.
10. Use the 4mm allen key/bit to fix the pin all the way through the caliper. Don't tighten it all the way up, make sure there is a bit of play either side to allow for thermal expansion. The 2mm bit is now used to tighten the grub screw on the safety bush.
11. Reverse if step 1 and 3 to mount the caliper back onto the kart.
BRAKE BLEED
12. Trace the brake line of the side you're starting on back to the master cylinder, open the lid and top with fluid.
13. On your starting side of the caliper place the 8mm spanner on the bleed nipple then place the fuel line over it.
14. Press the brake down, hold then open the bleed nipple. Air bubbles and some fluid should come out. Close the bleed nipple again and release the brake pedal.
15. Continue doing step 14 untill the fluid is clean, bubble free and don't forget to top up the master cylinder as you go.
16. Once both sides are bled and the pedal feels good, half fill the master cylinders and replace the caps.
17. Give the area a wipe down with degreaser or brake cleaner as you don't want any brake fluid sitting on your paint.
Now you're all done and ready to hit the track for a pad break in or just cut some quick times if your pads are already run in.
Повторяем попытку...
Доступные форматы для скачивания:
Скачать видео
-
Информация по загрузке:


