Angle Measurements in PC-DMIS | PC-DMIS Tech Tips - CMMXYZ
Автор: CMMXYZ
Загружено: 2021-04-21
Просмотров: 14174
Описание:
About CMMXYZ
We are North America's foremost independent measurement solutions provider. We sell new and used coordinate measuring machines, provide measuring services, upgrade and repair your systems.
Hey. So, in this video, I want to talk about angle measurements and really just to give you a few tips on measuring angles, because they can be difficult, especially to new programmers.
So, recently, I was helping a programmer who had just finished training measure, sort of, a complex angle, kind of, hard to set up. It actually involved quite a few steps, a few constructions, and a few settings I had to adjust. So I thought I'd share it with you. So, hopefully it will help you in your angle measurements.
Okay. So let's have a look at the drawing first. Okay. So here's the drawing and the angle we're talking about here is dimension 21, that 10-degree angle. And the difficult part here is we're measuring to the middle of a slot really. And also there's no orientation features marking that. You see that dotted line for the X,X section view? So there's no features associated with that. So we had to set up a special type of a construction for that.
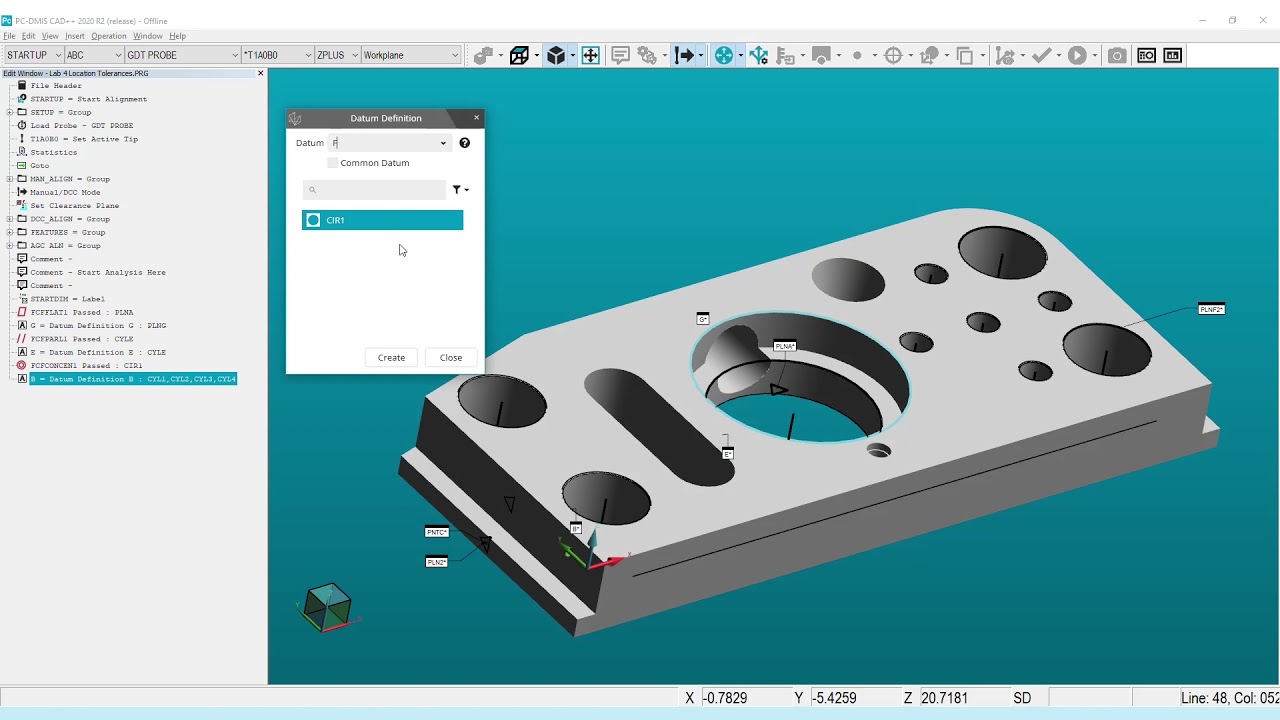
Okay. So I'll show you how I handled that in PC-DMIS. Okay. So here we are in PC-DMIS and you can see the CAD model for that part. And I've gone ahead and created two planes on either side of that slide. So the first thing I'll do is construct a mid plane between those. So we'll just go to the constructed plane, pick my two planes in the list and we'll call this mid plane, and the type will be mid plane and create. Okay. So there we go.
So the next thing I need to do is I need to establish what is essentially the Z-axis on this part, because I need to measure to that and from that in this example. So what I'll do here and what I did for the solution for the program where I was dealing with was I constructed what's called an alignment plane. So what I want to do is construct a plane that is normal to the Y plus axis. So to do that, I first need to put my active work plane in Y plus and go to constructed plane and this type of construction, I don't pick a feature from the list. I just select alignment as the type and I'll call this construction Y plus plane, and create.
There we go. So let's close that. Okay. So let's just drag that out. So if I zoom in here and rotate, what you will see is a tiny triangle representing that constructed plane that is normal to the Y plus axis. There we go. So essentially when we're in a 2D view, that will represent this blue arrow, which is the Z-axis in this case. Okay. So that's that.
So the third thing I want to do is I want to change something and set up options. If we hit F5 on the keyboard, under the dimension tab, you can see there's two different ways to display or deal with angle degrees. The default setting these days is 0 to 360, but because I'll be working with supplemental angles, I want to change that to 0 to +/- 180 degrees. And you'll see how that will come into play in a minute.
Okay. So, as I mentioned, we will be working with 2D angles in this example. So when we're working in 2D angles, we need to be mindful of the work plane. And as you can see it here, if I rotate a little bit, we were actually working in the XMINUS work plane. So I need to set my active work plane to XMINUS. There we go. Okay. So now we're ready to deal with that dimension. So I'll go ahead and open the angle measurements. And in this case, I'll pick mid plane first, Y plus plane second. And you can see it's given us an angle of -169.9 or essentially 170 degrees in the negative. And the reason it's negative is because we're measuring in a clockwise direction. So when we see the To radio button selected, that means we're measuring to the second selected feature to the Y plus plane, and that is from the mid plane. So in that case, that is -170 degrees.
When I checked the supplemental angle, but checkbox, it will give me the 10 degrees that I'm looking for. So a supplemental angle is either of the two angles, which make up 180 degrees. So, in this case, 10 degrees and 170 degrees. So, in this case, it is a positive angle because we're measuring that clockwise. Okay. So let's uncheck supplemental angle and clear the list and we'll try it in the reverse order. So let's pick Y plus plane first, mid plane second and you can see now it's a +170 degrees because we're measuring it counter-clockwise.
CMMXYZ - Coordinate Measuring Machines - http://www.cmmxyz.com/
Follow us on Facebook - / cmmxyz
Get the latest on Twitter - / cmmxyz
Follow CMMXYZ on LinkedIn - / canadian-measurement---metrology-inc .
Learn more about CMMXYZ on our blog - https://blog.cmmxyz.com/blog
Subscribe to our YouTube Channel - / cmmxyzvideo
Повторяем попытку...
Доступные форматы для скачивания:
Скачать видео
-
Информация по загрузке: