Turbo Wing Installation Video | XLAB Engineering
Автор: XLAB Hydration
Загружено: 2014-04-07
Просмотров: 34086
Описание:
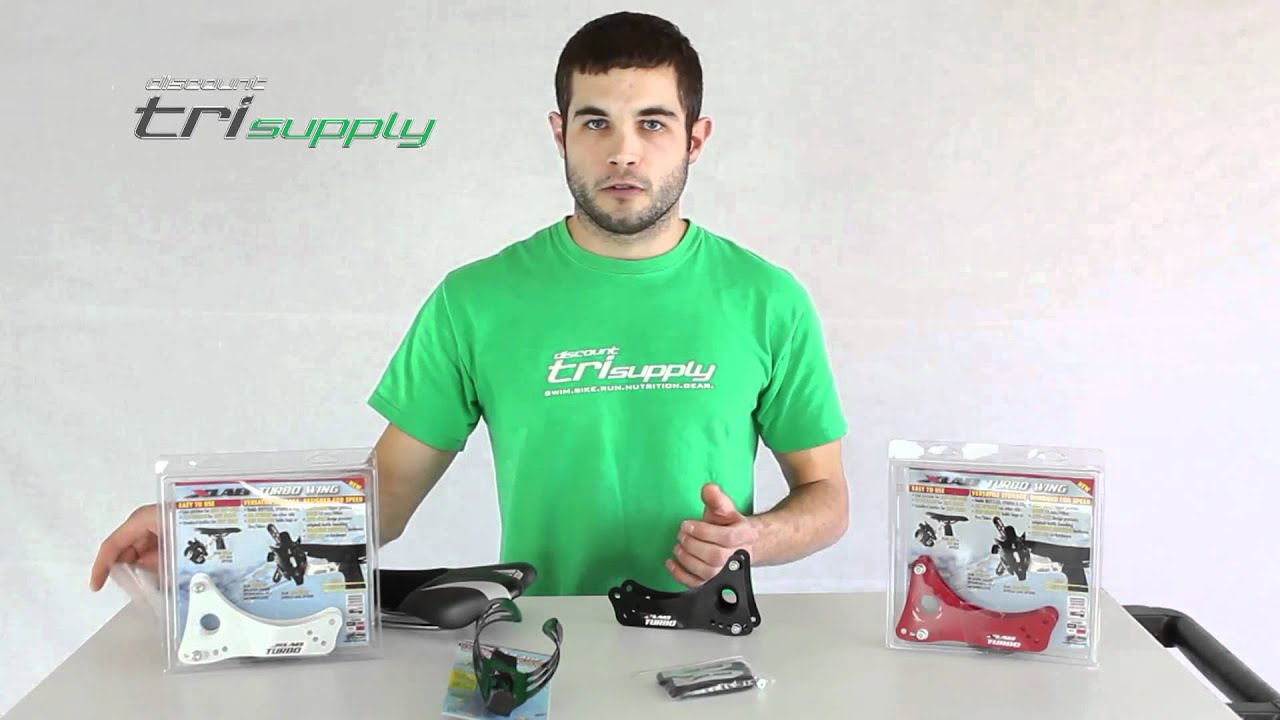
Here's a brief video on how to install a Turbo Wing to your saddle.
Our passion to help athletes go faster is based on our obsession with speed. 33+ World Championships with XLAB Engineering. Visit: https://www.xlab-usa.com/
#triathlete #athlete #cycle #racing #race #ironman #hydration #system #triharder #cycling
---
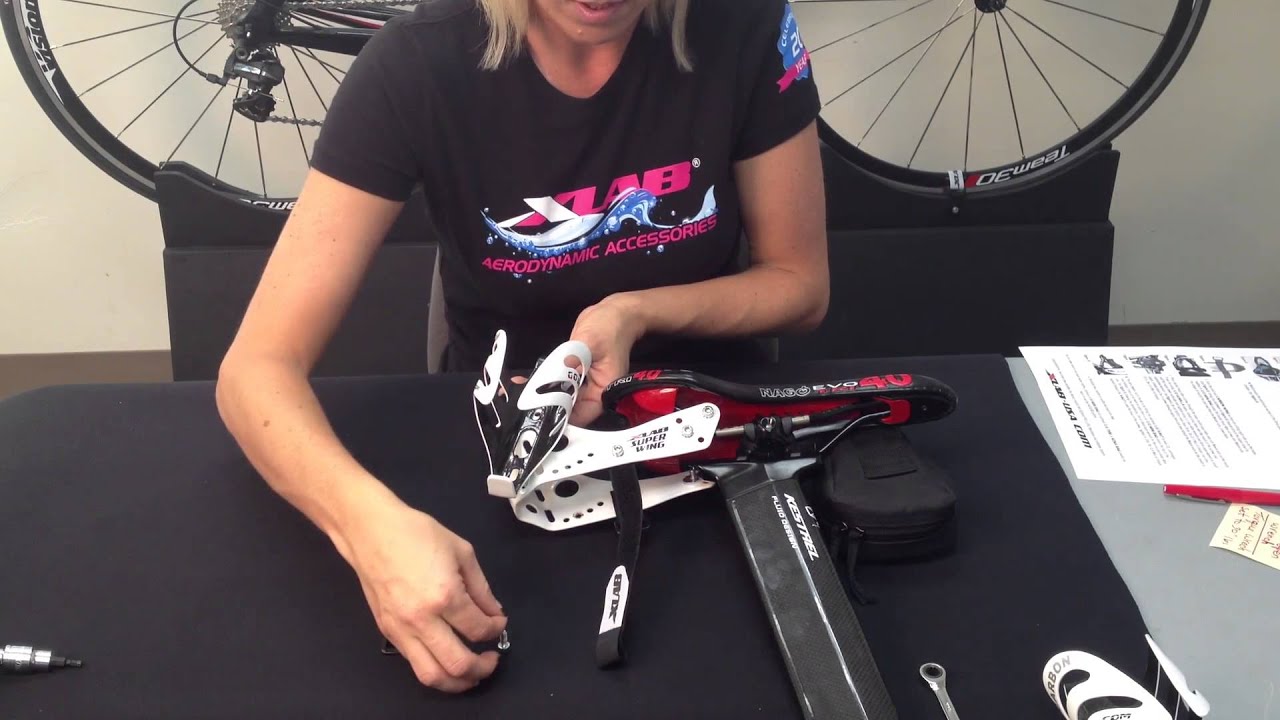
The first thing you want to do is to
uninstall the hardware that already came
on the carrier and we're going to be
putting our first strap on now you'll
put it on the other side of the
stabilizer which is right here and then
put the alloy plate right up against it
and at the same time we're going to
install our first cage so you'll put
your bowl but you took right off the
carrier and put it through the cage and
through everything and making sure
everything is lined up correctly and
then you can hand tighten
now we'll be putting the bottom strap on
the first thing you want to do is to
select which angle of your bottle case
you would like there's five different
options we're going to be using the
second one from the back so again using
the same process as the top uninstall
the hardware put your strap between the
stabilizer and the plate and then line
your cage up and then thread your screw
making sure the washers there
so now we have our first
age and our two straps loosely install
you want to make sure you don't fully
tighten it just yet and you can see the
straps are on one side of the stabilizer
next we'll take our second cage and
install it on this side so simply
uninstall these two screws put read the
screw through the two holes
the second cage is now installed and
this will be the time that we now
tighten all of the bolts using your
open-ended wrench clasp a stabilizer and
tighten each one now you'll be
activating the lock tight which should
set within 24 hours
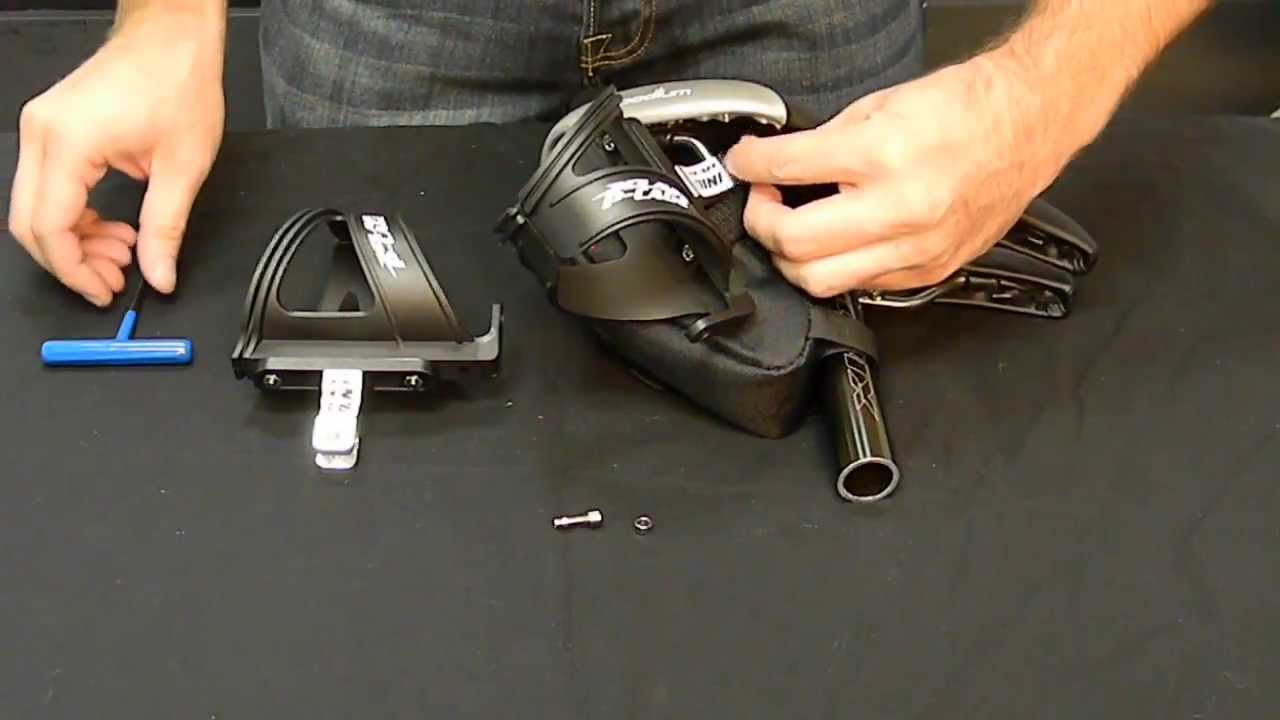
for this next step you'll need your
small bag that came with the box and it
has the saddle rail clips and we'll be
installing this not oil clips on the
turbo wing now the easiest thing is to
take your seat post out and install the
turbo wing directly on there and then
you can put your seat posts back in
so as you can see here I've readied
these screws and put the lock washers on
them already makes the install a whole
lot easier so you'll take your first
saddle clip and install it on this first
hole so what you do line up the holes
together take the first screw and thread
it in and you'll do the same thing on
the other side saddle clip put it inside
and thread the screw through
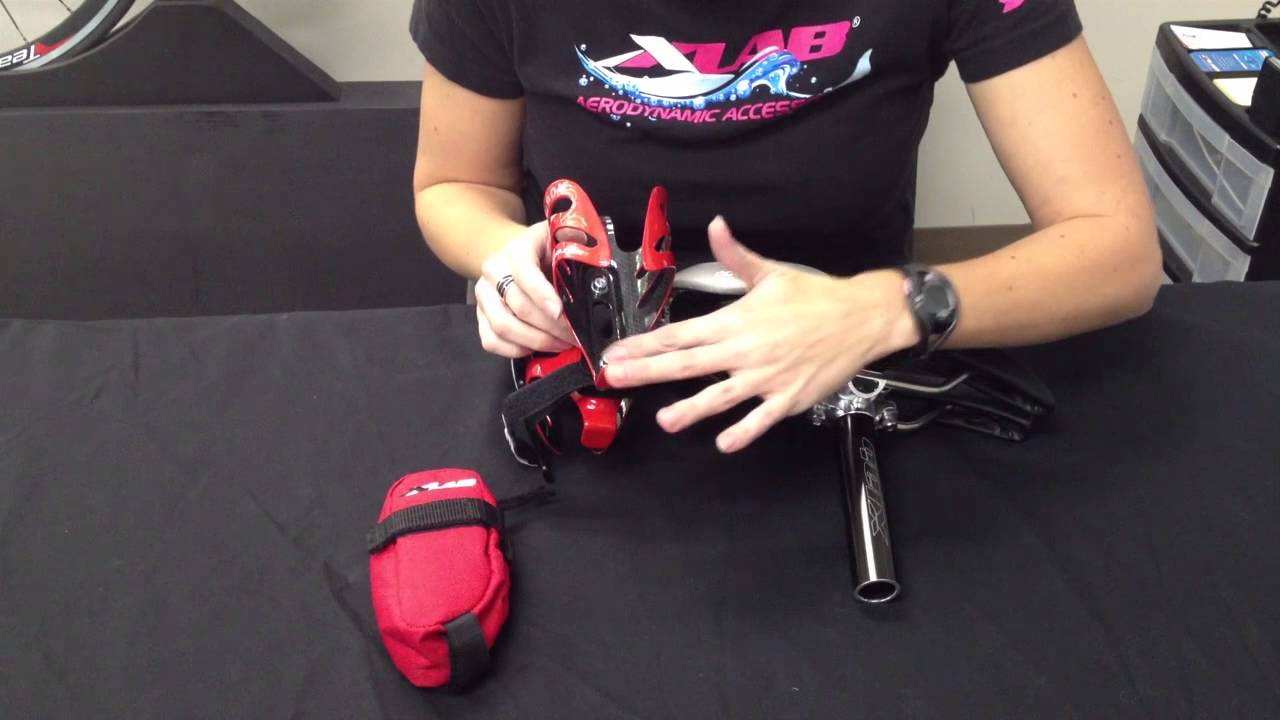
so we'll be flipping the saddle over as
well as the turbo Eng and installing a
solar eclipse on your rails now you want
to check which angle you want your
carrier at we're going to be using the
top hole because it's really good with
this saddle so you'll put the plate lift
the shadow around tick your screw with
the lock washer already on it and thread
in and hand tighten and we'll do the
same thing on the other side as well
so now we have loosely install the turbo
onto the saddle rails and the optimum
angle is parallel having the turbo in
parallel to the ground and now we'll
tighten all of the mounting hardware
with your 4 millimeter wrench and then
go back over the 4 bolts with the torque
wrench and tighten it up to 30 inch
pounds so now all of the boats on the turbo Eng
and on the gorilla cage should be really
tight either torque to the thirty inch
pounds or as tight as you can get it
with your four millimeter wrench next
we'll be installing the mini bag onto
the back of your trowing so the first
thing you want to do is to line it up
put the bottom strap over undo this
fastening thread it through the buckle
05:56
and strap it down now I like to do it
06:02
loose at first just so I can then
06:04
position the bag and then I will go back
06:08
and retighten so again with the top
06:12
strap thread it through the buckle and
06:16
loosely strap down and you can adjust it
06:21
so that it's directly straight
as you can see there's a hole in the
08:40
sonic net and that hole you will use and
08:44
basically and replace the stabilizer
08:46
you'll install the stabilizer thread the
08:49
two screws through the hole and then you
08:52
have a super aerodynamic and inflation
08:53
system at the back
Повторяем попытку...
Доступные форматы для скачивания:
Скачать видео
-
Информация по загрузке: