how to check Computer Power Supply | Atx Power connector pin out and working | Bangla
Автор: Ashik Computer and Hardware Lab
Загружено: 2019-02-07
Просмотров: 58674
Описание:
Computer Power Supply checking | Atx Power connector pin out and working | Bangla
#PowerSupply
#CheckComputerPowerSupply2019
#TestSMPs
#ATX24PinConnectorsWorking
#FullCheckPowerSupply
#BanglaToturial2019
Our Official Website and Info:
New Videos Link: • Best Digital Multimeter | Use of Laptop De...
Official Pchelpline page: https://bit.ly/2IRkWHT
Please, my Channel: https://bit.ly/2IW04iI
SE CAUTION HERE (Though you’d only be shocked with a max of 24 volts)
PC Power Supply Testing :
Make a paper clip tester. You can use a paper clip to help test your power supply and trick it into thinking that it has been switched on. To do this, straighten a paperclip and then bend it into a “U” shape.
This paperclip will act as the pins that are inserted into the power supply that give it the “Power ON” signal.
Find the 20/24 Pin connector that normally attaches to your computer’s motherboard. It is typically the largest connector for the power supply.
Find the green pin and a black pin (pins 15 & 16). You will be inserting the ends of the paperclip into the green pin (there should be only one) and a neighboring black pin. Before you do this, double check to make sure that the power supply is completely disconnected from any power outlet, that it is switched off, and that it is not connected to any computer components.
The green pin is typically pin 15 on a pin chart.
Insert the paperclip. Once you have placed the paperclip into each of the pins, place the cable somewhere where it won’t be disturbed. Plug the power supply back into the outlet, and flip the switch in the back.
Check the fan. Once the power supply is receiving power, you should be able to hear and/or see a fan moving. This will let you know that the power supply is at least working. If the power supply does not turn on at all, double check your pins (after unplugging) and try again. If it still does not turn on, then it is most likely dead.[1]
This test will not tell you if the power supply is functioning as it should, just that it is turning on. You will need to perform the next test to ensure that it is outputting correctly.
Part
2
Testing the Output
Image titled Check a Power Supply Step 8
1
Check the output through software. If your computer is functional and you can load your operating system, try using software to check your power supply’s output. SpeedFan is a freeware program that will read your computer’s diagnostics and report back your temperatures and voltage’s. Check the readouts to ensure that they fall within accepted tolerances.
If your computer does not work, skip to the next step.
Image titled Check a Power Supply Step 9
2
Shut down the computer. Unplug the power supply from the outlet. Turn off the power switch on the back of the power supply. Open the computer and disconnect all of the components from the power supply. Follow the cables from the power supply to each component to ensure that everything has been properly disconnected.
Test the power supply with a power supply testing unit. These are available online and from computer stores, and are not very expensive. Find the 20/24 pin connector on the power supply. This is typically the largest cable for the power supply.
Connect the power supply testing unit to the 20/24 pin connector.
Plug the power supply back into the outlet and turn it on. Your power supply should turn on automatically and your power supply tester will light up.
Some power supply testers require you to turn on the power supply using a switch or button on the tester. Others will turn on automatically.
Check the voltages. The 20/24 pin connector will have multiple readouts, but there are 4 essential measurements you need to look for:
+3.3 VDC
+5 VDC
+12 VDC
-12 VDC
Ensure that the voltages are within normal accepted tolerances. +3.3, +5, +12 can all be within +/- 5%. The 12 can be within +/ 10%. If any of the readings are outside that range, than the power supply is bad and needs to be replaced.
Test the other connectors. Once you’ve verified that the main connector is outputting power properly, test each of the other connector cables one by one. Unplug and turn off the power supply between each test.
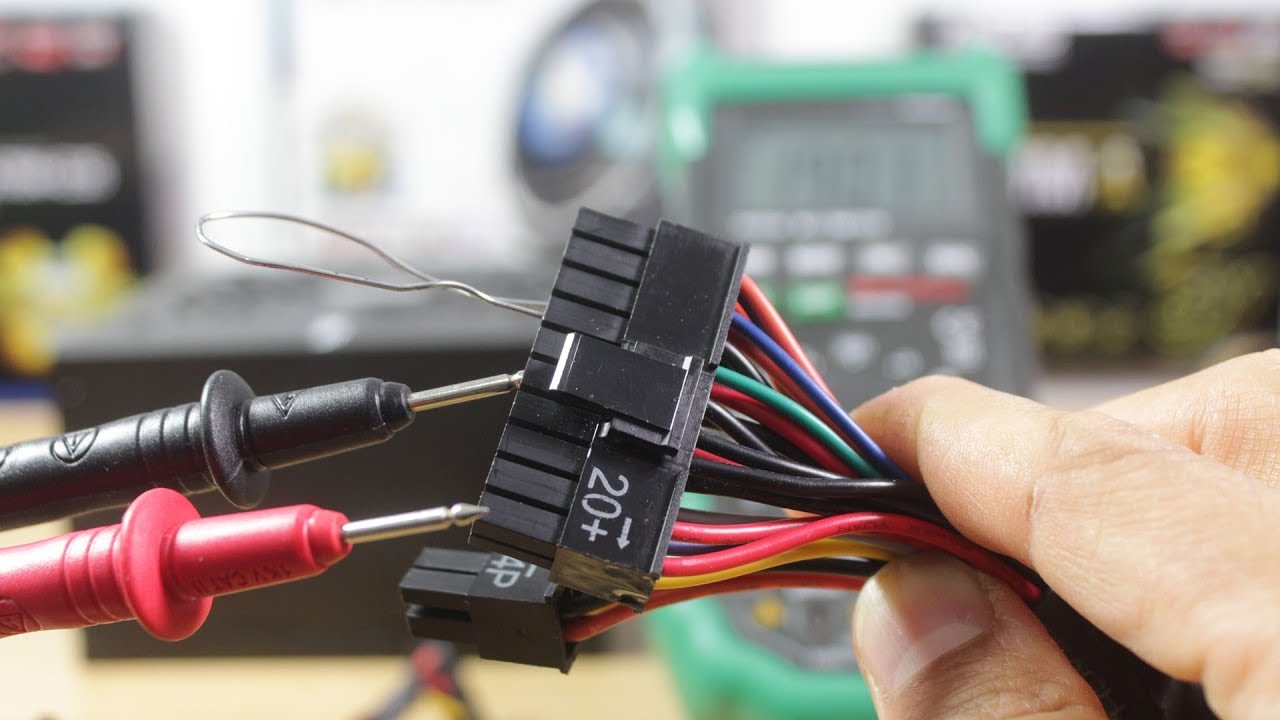
Test the power supply with a multimeter. Straighten a paperclip and then bend it into a “U” shape. Find the green pin on the 20/24 pin connector. Plug the paperclip into the green pin (pin 15) and into one of the neighboring black pins. This will trick the connector into thinking it’s plugged into the motherboard.
Plug the power supply back in and turn it on.
Find a pinout chart for your power supply. This will let you know which pins provide which voltages.
Set your multimeter to the VBDC setting. If your multimeter does not auto-range, set the range to 10V.
Connect the negative probe of the multimeter to a ground (black)
01746659826 Contract Number
Повторяем попытку...

Доступные форматы для скачивания:
Скачать видео
-
Информация по загрузке: