FFX Masters Challenge Mod - NRINSNDGNTNGNFBNNENTQ Challenge Part 48 - Seymour Omnis
Автор: The Marv
Загружено: 2026-02-23
Просмотров: 23
Описание:
This was done on Version 2.3.
NRI - No Regular Items. ie, no accessing the Items or Quick Pockets commands inside or outside battle. Also, no Auto Phoenix/Med/Potion armor abilities. Use command and Mix ovedrive are allowed.
NS - No Summons. You can't summon except when forced to. (Exceptions: Forced Garuda battle in Besaid, forced fights against Isaaru.)
NDG - No Dropped Gear (from bosses).
NTNGNFB - No Threaten, No Gravity attacks, No "Full Break" Skill.
NNE - No [No Encounters] auto-ability.
NTQ - No Trio of 9999/Quartet of 9 Mixes.
Alongside with those restrictions, I will also do a progression lock where you will not be allowed to do postgame stuffs (Cavern of the Stolen Fayth and beyond) before beating BFA & Yu Yevon. This is to ensure BFA is at its intended difficulties.
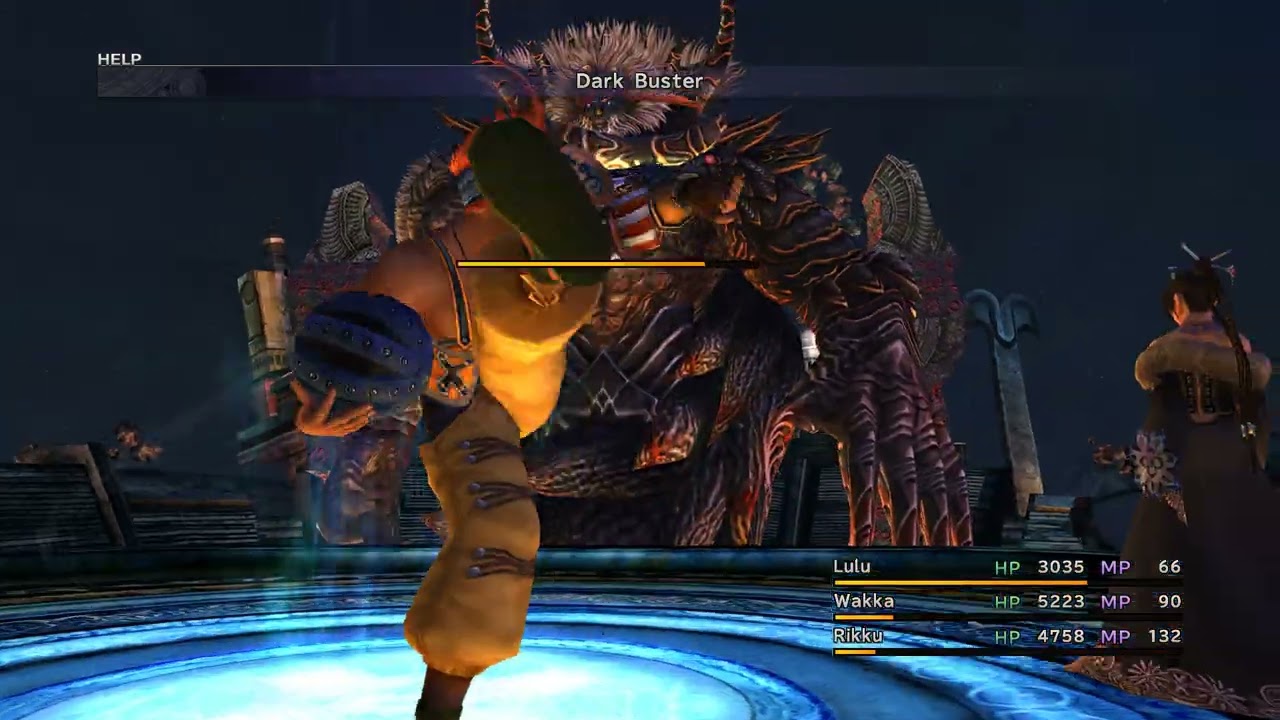
Version 2.2 bring one simple changes to Seymour Omnis' moveset: the Divine elemental attacks were replaced into a non-elemental status moves. Normally before v2.2 you could get away with a 3-1 Mortiphasms formation if you used the SOS-Nulls ability, but now since it was non-elemental you can't block it anymore, and the statuses are also pretty debilitating:
3x Fire: Fallout (Berserk+Darkness)
3x Ice: Stone Breath (Stone + Slow)
3x Thunder: Shock Trauma (Confuse + Silence)
3x Water: Poison Mist (Sleep + Poison)
Rather than trying to make an armor that could block the statuses AND block the elemental spells before it, I would rather just avoid the 3-1 formation completely. Thankfully this will only affected on his even turns, this means that on the odd turns you could still use the 3-1 formation if you relied on the SOS-Nulls. For the even turns the 2-1-1 formation is the best for the SOS-Nulls strategy, this way you will get more Tetra-Spells that we're gonna take advantages off to farm OD using Rook.
However, there's also changes in version 2.2 that are indirectly affected this fight: The increased cost of customizing SOS-Nulls from 2 tier two elemental items into 5. This means that you can only customize a total of 6 SOS-Nulls rather than 15 (!!) in the previous versions, so you really need to think ahead whether it was worth to customize or not. There's some SOS-Nulls weapon and armor from various shops across Spira at least, so you could buy those alternatively if you want to save the tier 2 elemental items.
In the end, I end up with this setup:
Tidus: SOS NulTide weapon (from Luca Shop) + SOS NulBlaze/Frost/Shock armor
Wakka: SOS NulTide weapon (from Luca Shop) + HP+10%/SOS NulFrost/Blaze/Shock armor (from Gagazet Mountain Cave chest)
Auron: SOS NulShock weapon (from Thunder Plains Agency) + SOS NulBlaze/Frost/Tide armor (from Wantz' Shop)
Rikku: SOS NulFrost weapon (from Lake Macalania Agency) + SOS NulBlaze/Shock/Tide armor
Kimahri: HP+30%/SOS NulBlaze/Frost/Shock armor (from Kilika Temple chest)
This left me with 15x Bomb Cores, 10x Lightning Marbles, 20x Arctic Winds, and 19x Dragon Scales, which I hope will be enough for postgame especially the Crazy Aeons.
Now, let's talk about the fight itself. With No Threathen, we need to figure out a way to survive the first turn. I had the SOS-Null party enter the battle in critical HP to immediately activate the SOS Nulls. We also need Wakka to Silence Attack to give us more time to prepare, but 2x Aim was needed for him to be able to hit Seymour 100% of the time (if you used 2x Fortune Sphere on him, you'll only need 2x Aim instead of 3).
After the Silence Attack, we want to cast Protect on Auron so he can tank the Breaks with Sentinel from the odd turn moveset. He won't have enough time to Power Break Seymour though because of the 3x Aim needed, so there's a chance that he will die if Seymour's got critical on both of the breaks, but it shouldn't be the end of the world cause Seymour is slowed and you should have enough time to revive him and set up the 2-1-1 formation at the same time.
Our next goal will be to set up 3x Aim on Auron to Power and Mental Break Seymour. The Mental Break will make sure that Lulu'll hit for quad 9s easily.
Now, let's talk about Seymour's Requiem. Normally we could just summon to tank it, but since we can't summon in this challenge, our only option would be Auto-Life. However, there's one problem, Auto-Life costs a lot of MP, and we don't have enough firepower to finish off Seymour without seeing Requiem twice. Yuna will not have enough MP for that, and with No Regular Items, you can't use Ether to replenish her MP.
One solution to that is to use Rikku's Freedom X Mix for zero MP Cost. The cheaper alternative way is to mix a Megalixir or using a Soul Spring, but I'm afraid that I won't have enough MP for Dispelling the Hyper Mighty G from Seymour later.
One thing to note though, is that you don't want to kill Seymour just after he uses Requiem. Dying means his Slow was removed, and I was lucky that Rikku got a turn before Seymour's next turn, just in time to change the Mortiphasm into Fire/Ice/Thunder.
Повторяем попытку...

Доступные форматы для скачивания:
Скачать видео
-
Информация по загрузке: