2006-2013 BMW 335i/135i Performance Aluminum Radiator Installation, by Mishimoto
Автор: Mishimoto Automotive
Загружено: 2014-06-18
Просмотров: 136251
Описание:
Product Page: http://mishimo.to/1RY2dXu
Facebook: / gomishimoto
Twitter: / mishimoto
Instagram: / mishimoto
Engineering Blog: http://engineering.mishimoto.com
Mishimoto, the world leader in performance cooling products, shows you how to install the Mishimoto Performance Aluminum Radiator for the 2006--2013 BMW 335i/135i! Features include:
• Direct fit for the 2006--2013 BMW 335i and 2007--2012 BMW 135i
• Fully brazed two-row aluminum core with robotically TIG-welded end tanks
• No modification necessary for installation, functions with all stock equipment
• Precision designed CNC-machined quick-disconnect fittings mate perfectly with stock hoses
• 35% coolant capacity increase
• 25% increase in core thickness
• Includes magnetic drain plug with high-quality dowty seal
• Mishimoto Lifetime Warranty
Model: MMRAD-E90-07
INSTALLATION INSTRUCTIONS
Downloadable Install Instructions: http://lib.store.yahoo.net/lib/yhst-6...
PARTS LIST
(1) MISHIMOTO BMW 335i/135i PERFORMANCE ALUMINUM RADIATOR
(1) MISHIMOTO MAGNETIC OIL DRAIN PLUG
(1) M6 x 10mm FAN SHROUD BOLT
Disclaimer
• Please dispose of any liquids properly.
• Allow vehicle to cool completely prior to attempting installation.
• Mishimoto Performance (MP) is not responsible for any vehicle
damage or personal injury due to installation errors, misuse,
or removal of MP products.
• MP always suggests that a trained professional install all
MP products.
• Do not run the engine or drive the vehicle while overheating.
Serious damage may occur.
• Raise vehicle only on jack stands or on a vehicle lift.
INSTALLATION INSTRUCTIONS
01 | REMOVING THE STOCK RADIATOR
1. Remove the front shield. (2x T20 Torx screws)
2. Loosen the bleeder on the coolant reservoir. (flathead screwdriver)
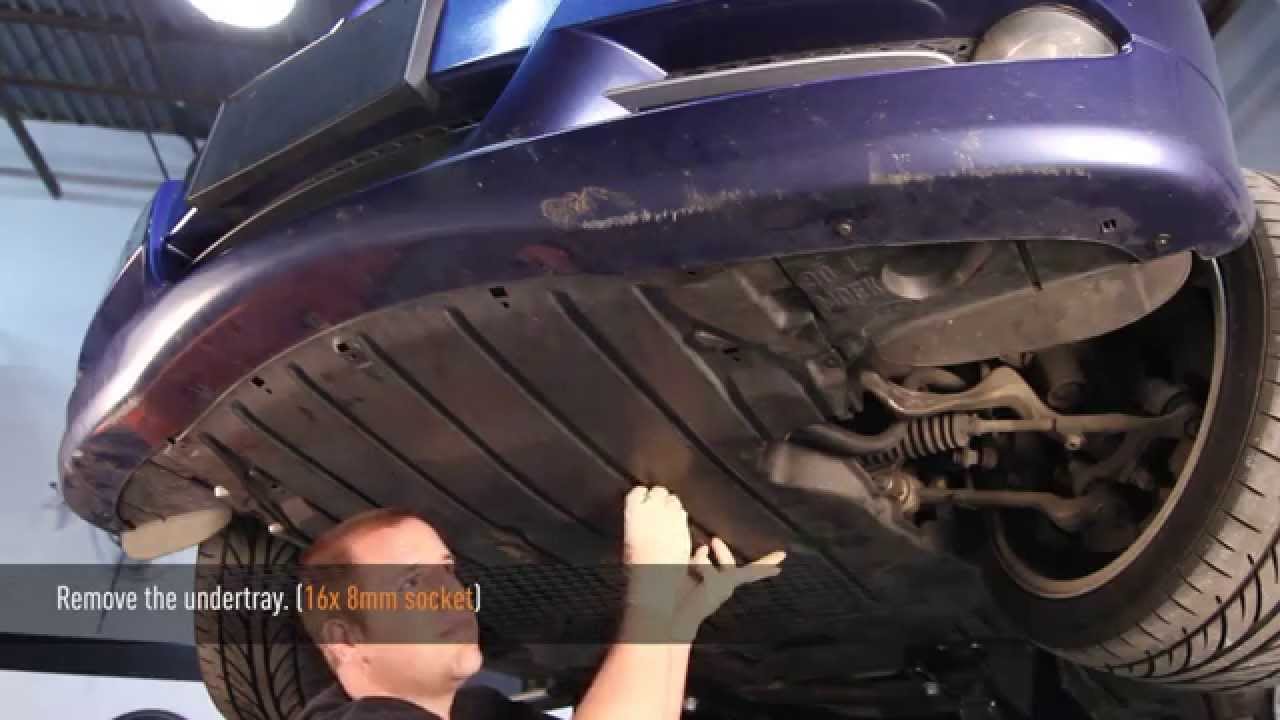
3. Remove the undertray. (16x 8mm bolts)
4. Disconnect the two charge pipes, using the quick-disconnect
couplers on both. (flathead screwdriver)
5. Remove the stock drain plug, and drain the coolant.
(flathead screwdriver)
6. Once the fluid has completely drained, reinstall the drain plug.
(flathead screwdriver)
7. Remove the upper radiator hose at the quick-disconnect
coupler. (flathead screwdriver)
8. Remove the overflow hose from its clip.
9. Disconnect the electrical fan connector. (flathead screwdriver)
10. Once disconnected, move the electrical harness out of the way.
11. Remove the upper fan shroud bolt. (T25 Torx screw)
12. Disconnect the fan shroud clip located by the driver-side
charge pipe.
13. Remove the fan shroud assembly.
14. Remove the lower radiator hose at the quick-disconnect
coupler. (flathead screwdriver)
15. Remove the two upper radiator bolts. (T25 Torx screwdriver)
16. Remove the radiator from the engine bay.
02 | REMOVING THE STOCK
FRONT-MOUNT INTERCOOLER
1. Remove the two intercooler screws. (T25 Torx screwdriver)
2. Remove the stock front-mount intercooler.
03 | INSTALLING THE MISHIMOTO
PERFORMANCE RADIATOR
1. Install the new Mishimoto radiator into the engine bay.
2. Reinstall the two radiator bolts. (2x T25 Torx bolts)
3. Reconnect the lower radiator hose.
4. Reinstall the stock fan shroud. Make sure the fan shroud falls
into the driver-side tab.
5. Install the supplied M6 fan shroud bolt. (1x 10mm bolt)
6. Reinstall and reattach the electrical harness and connector.
7. Reinstall the upper radiator hose and overflow hose.
04 | REINSTALLING THE STOCK
FRONT-MOUNT INTERCOOLER
1. Reinstall the stock intercooler and bolts. (2x T25 Torx bolts)
2. Reinstall the two charge pipes on the intercooler using the
quick-disconnect couplers.
3. Reinstall the stock undertray. (16x 8mm bolts)
4. Reinstall the stock intake duct. (2x T20 Torx screws)
5. Remove the coolant reservoir cap.
6. Fill the coolant system, run the vehicle, bleed the system, and check
for any leaks.
7. You have now successfully installed the Mishimoto 2006–2013
BMW 335i/135i Aluminum Performance Radiator. Enjoy!
Повторяем попытку...
Доступные форматы для скачивания:
Скачать видео
-
Информация по загрузке:


