Tangency Problem 4: How to Construct the Figure Accurately – Drawing the Figure Step by Step
Автор: ENGINEERING DRAWING MADE EASY
Загружено: 2025-11-18
Просмотров: 6
Описание:
Welcome back to Engineering Drawing Made Easy!
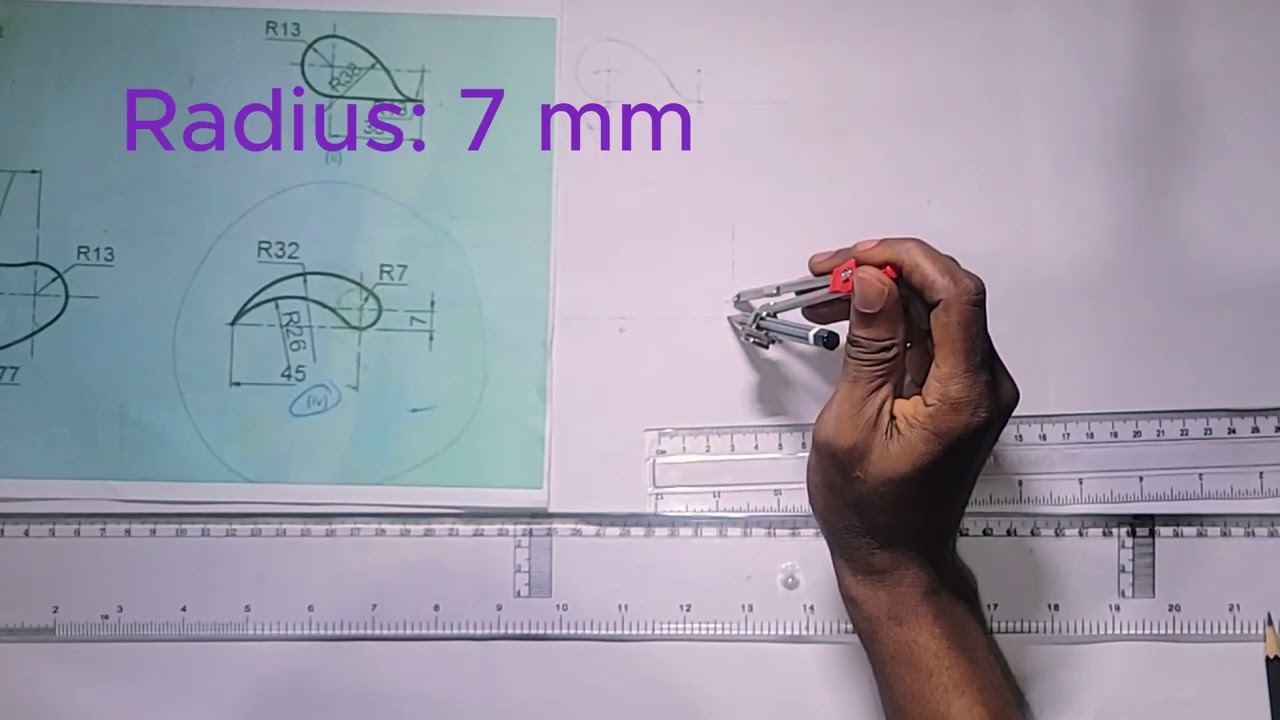
In this tutorial, we work through Tangency Problem 4, focusing on how to construct arcs of radii 7 mm, 32 mm, and 26 mm using the rules of internal and external tangency.
This problem looks simple at first glance, but it requires a clear understanding of how arcs relate on a common center line. In this video, you will learn how to:
• Read and interpret the given dimensions correctly
• Identify which arcs touch internally and which ones touch externally
• Apply tangency rules using addition and subtraction of radii
• Use a center line to position arcs accurately
• Locate arc centers step by step using your compass and ruler
• Complete the figure neatly and check for accuracy
This tutorial is perfect for students learning engineering drawing at the tertiary level and anyone who wants to strengthen their understanding of tangency constructions.
Pause the video and draw along — it makes the learning process easier and more effective.
💬 Got a question or a tangency problem you'd like me to solve?
Leave it in the comments or send it in — your question may appear in the next video.
📩 For extra help or to send your work:
[email protected]
👍 If this tutorial helped you understand the topic or complete your assignment, kindly like the video.
🔔 Subscribe and turn on notifications to stay updated with upcoming engineering drawing lessons.
Let’s keep making Engineering Drawing simple and enjoyable to learn.
Повторяем попытку...
Доступные форматы для скачивания:
Скачать видео
-
Информация по загрузке:


