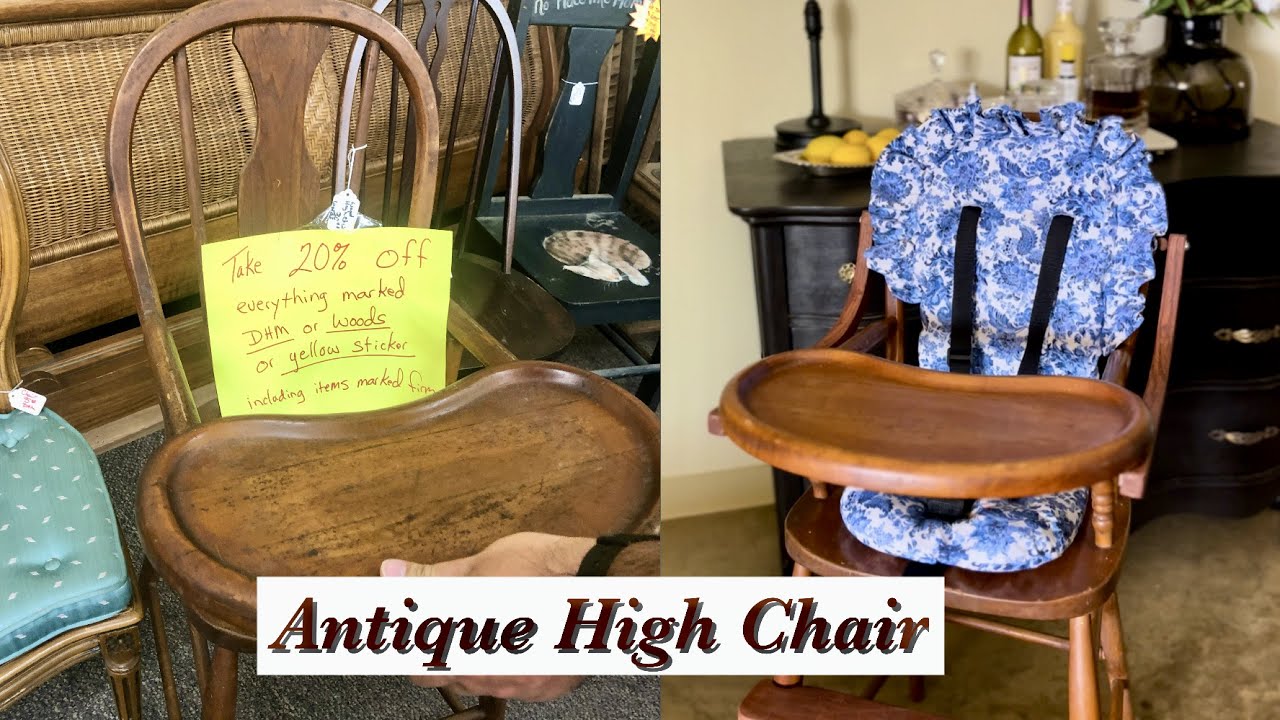
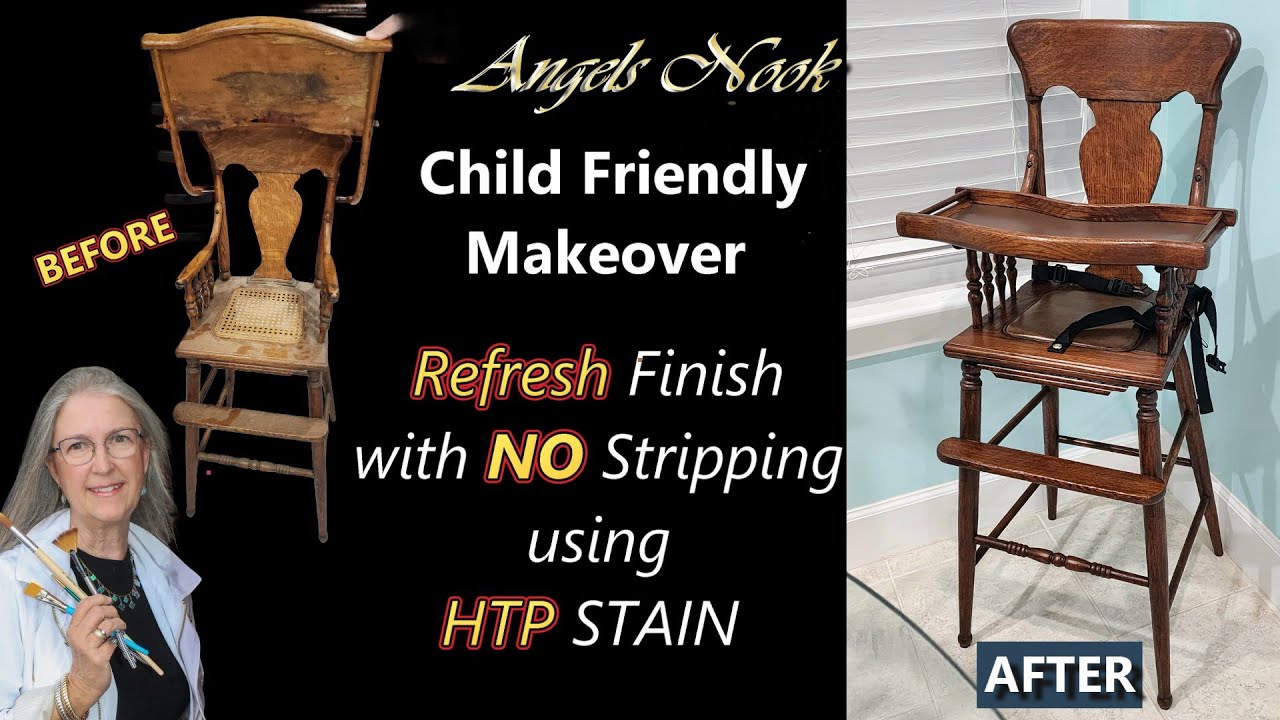
Antique High Chair Restoration Using HTP Stain
Автор: Angels Nook
Загружено: 2025-08-23
Просмотров: 450
Описание:
This antique high chair from around 1910 is getting a new life! Once a nursery essential, this tiger oak piece has been carefully refreshed and modernized using HTP Stain (Heirloom Traditions Paint) to create a beautiful youth chair that can scoot right up to your dining or kitchen table.
In this video, you’ll see how the chair’s damaged cane seat and split wood were replaced with a child friendly seat, why oak is such a durable choice, and how HTP Paint transforms the look while preserving the charm of its antique craftsmanship. If you’ve ever wondered how to bring vintage furniture back to life, this project shows you exactly what’s possible with the right stain and techniques. The staining techniques are applicable to any wood project.
Join us for more Heirloom Traditions Paint makeovers, DIY restoration projects, and tips on refinishing furniture. Don’t forget to like, subscribe, and tap the 🔔 to follow along with Angels Nook for future transformations!
🎨 Get the exact All In One Heirloom Traditions Paint Gel Stain I used!
👉 https://tidd.ly/3QpH2Cu
🆓 LIMITED FREE HTP PAINT SAMPLE – Just Pay Shipping!
✅ Full coverage for a small DIY project!
✅ Choose Your Color & Checkout with CODE: DIY
🚚 Only $6.99 Shipping – No Hidden Fees!
⏳ Limited-Time Offer – Don't Miss Out!
🚀 Claim Your FREE Sample: https://tidd.ly/3QqmsBW
00:00:00 Introduction
00:02:37 Why the order of deglossing matters
00:04:06 Deglossing with LIQUID deglosser
00:05:52 The SQUEAKY sound you should hear
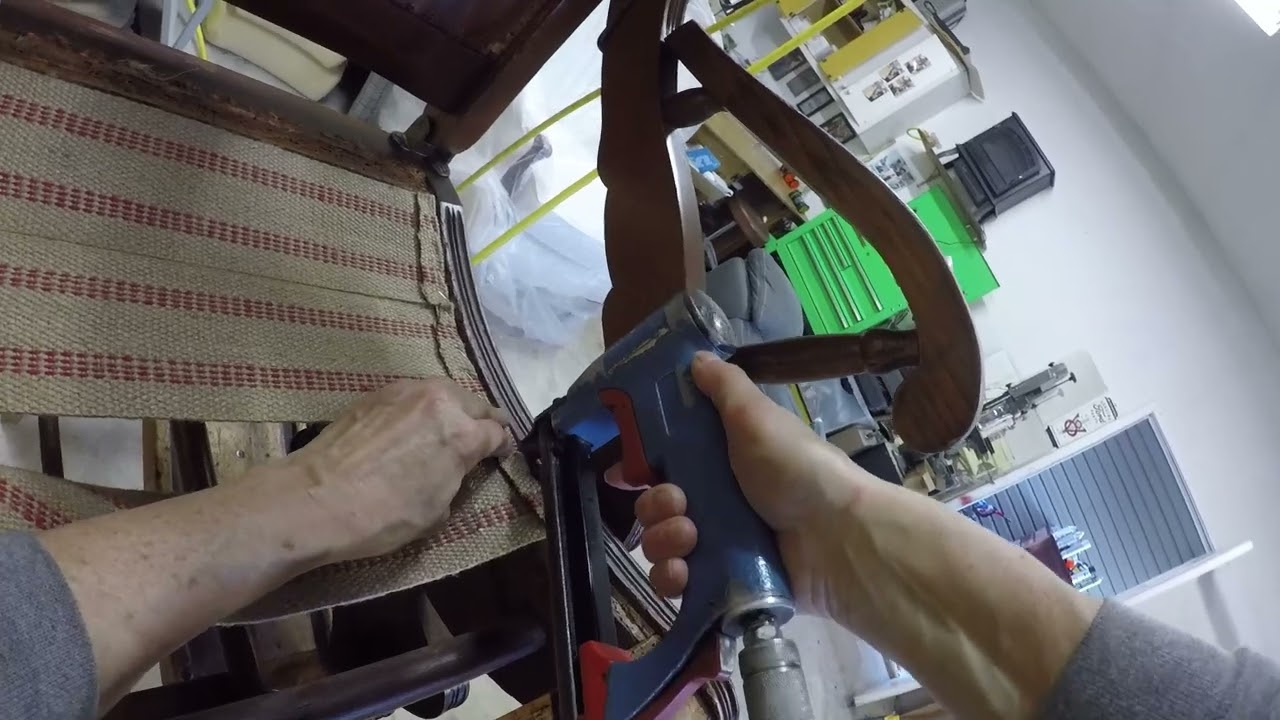
00:06:12 Prep done to seat after caning was removed
00:07:26 How to make pattern for vinyl seat
00:09:24 Dry fit of vinyl and padding for seat
00:09:55 Checking fit of caning spline
00:10:50 Why soak the spline in water
00:11:21 Why I used HIDE glue
00:12:02 Why batting was used under the vinyl
00:12:58 Spline after soaking and how it is dried
00:15:20 Gluing vinyl and spline in place
00:23:17 Wait to cut the spline and use soft tool on spline
00:27:58 Why we are changing the tray design
00:28:56 Drybrushing to help hide wood putty after Shellac
00:34:44 This technique works for touc hup repairs
00:35:09 The drybrush MUST dry 24 hrs
00:35:32 Why you drybrush the spline too
00:37:17 Why flip it upside down to STAIN
00:38:40 Applying stain to the legs and crossbars
00:45:00 Staining underneath side of the seat
00:47:06 Staining the upper part of the chair
00:48:22 Wipe off stain from areas you aren't working on yet
00:51:14 How to avoid creating blotchy areas
00:52:14 Staining chair arm spindles
00:53:22 Staining the back pieces of the chair
00:54:39 Use good light and check for overages
00:55:25 Staining seat including vinyl and spline
00:56:29 Watch for missed areas as you work
00:57:00 Why front edge was left for last
00:59:08 Blending stain on the vinyl
01:01:13 Curved arm supports
01:03:52 Using WOOD EPOXY to stabilize hardware
01:05:48 Using Sharpie to create grain lines on wood putty
01:10:09 1st coat of stain over the Sharpie lines
01:11:30 Wipe off any overage of stain on dry areas
01:12:23 Second coat of stain over putty on tray
01:14:24 Final look at finished high chair
01:17:39 Slideshow
#HTPStain #HeirloomTraditionsPaint #FurnitureRestoration #DIYRestoration #VintageFurniture #AntiqueFurniture #WoodStaining #FurnitureMakeover
Повторяем попытку...
Доступные форматы для скачивания:
Скачать видео
-
Информация по загрузке: