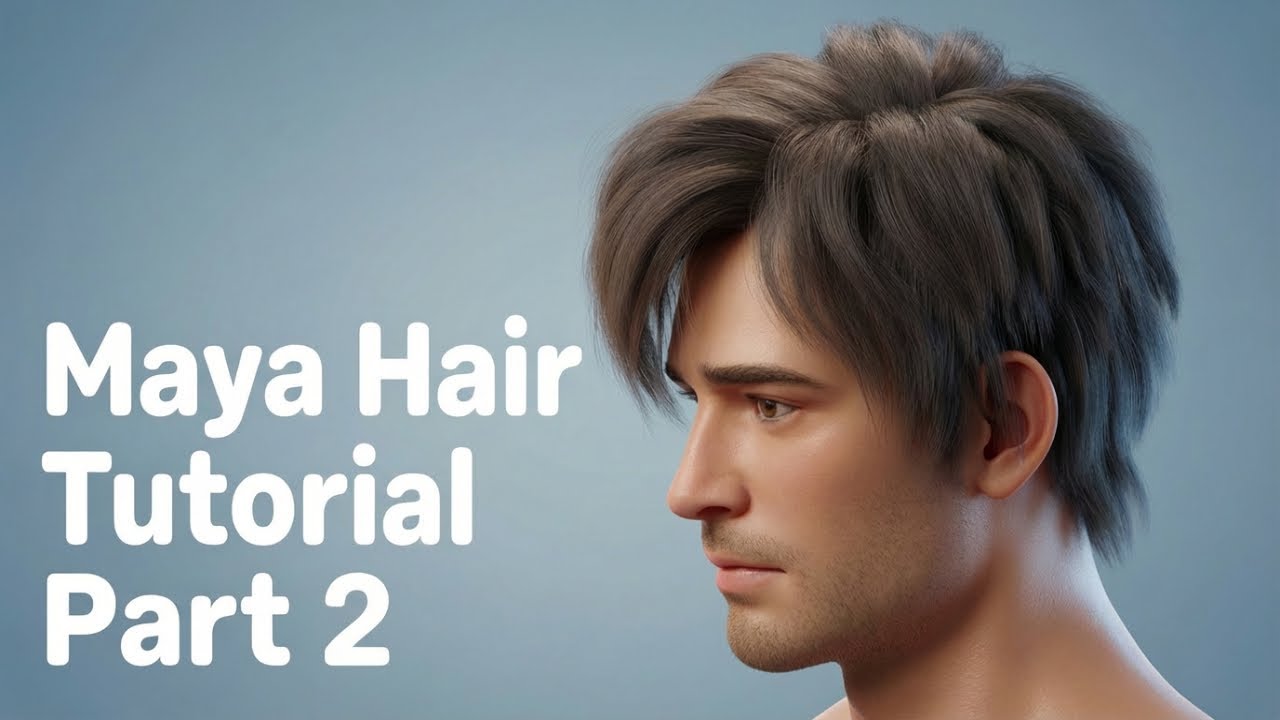
Maya Character Hair | Maya Main Hair Kaise Banaye
Автор: cg artist all rounder
Загружено: 2025-12-09
Просмотров: 118
Описание:
Is video me hum aapko batayenge ki Maya main character ke liye hair kaise banate hain. Hair modeling tips in Maya!
Creating character hair in Maya is typically done using two main methods: XGen (Interactive Grooming) for hyper-realistic or detailed hair/fur, or Polygonal/Hair Card Modeling for optimized, stylized, or game-ready hair.
🛠️ Primary Hair Tools in Maya
The most powerful and common way to create high-quality, renderable hair in modern Maya is with XGen.
1. XGen Interactive Grooming
XGen is a powerful toolset for generating hair, fur, and instanced geometry by scattering primitives (individual hair strands) across a mesh surface. The Interactive Grooming system provides a brush-based, non-destructive workflow.
XGen Workflow:
Create Groom Splines: Select your character's scalp mesh (or a dedicated hair cap mesh) and go to Generate Create Interactive Groom Splines. This generates an initial blanket of hair splines.
Grooming (Brushes): Use the Interactive Grooming tools to sculpt the hair. These function like real-world grooming tools:
Comb Tool: Drags and changes the direction/orientation of the hairs.
Cut Tool: Trims the length of the hairs.
Length Tool: Uniformly lengthens or shortens the hairs.
Clump Tool: Pulls hair strands towards a central point to create natural clumping effects.
Modifiers: Add non-destructive effects using Modifiers in the Interactive Groom Editor to add realism:
Noise: Creates random, subtle variations (frizz or flyaways) in the hair.
Clump: Adds overall clumping across the entire description.
Collision: Ensures the hair strands do not pass through the character's body mesh.
Shading and Rendering: Apply a dedicated hair shader (like the aiStandardHair shader in Arnold) to control the color, specularity, and light transmission for realistic results.
2. Polygonal/Hair Card Modeling
This method involves creating thin polygon strips (called hair cards) with hair textures (alpha-masked) and strategically placing them to build the hairstyle. This is the standard method for real-time video games due to its low polygon count and render efficiency.
Hair Card Workflow:
Create Textures: Generate or paint hair textures that include the color map, alpha map (for transparency), normal map (for surface detail), and depth map.
Model Hair Cards: Create thin, flat polygon strips.
Place Cards: Place the cards in overlapping layers to mimic the flow and volume of hair, starting with larger clumps near the scalp and working outward for finer details.
Assign Shader: Apply a standard shader and assign the texture maps.
🌊 Dynamic Hair (nHair)
Maya's nHair system is part of the nDynamics framework. While XGen is the primary tool for grooming (creation), nHair is often used for simulation (physics). You can link your XGen guides to an nHair system to make the hair react realistically to gravity, wind, and movement.
hair simulation, cgi hair simulation, maya tutorial, maya nhair, maya tutorials, hair binding tutorial, maya 2020 tutorials, simulation, dynamic simulation, maya animation, nhair, simulation (literature subject), tutorial, character design tutorial, hair dynamics optimization, 3d tutorial, video tutorial, mh tutorials, modeling tutorial, hair (quotation subject), hair tips & tricks, female hair, autodesk maya, realistic hair, autodesk maya (award-winning work), xgen hair, maya dynamics, maya workflow, maya, hair, maya 3d
Повторяем попытку...
Доступные форматы для скачивания:
Скачать видео
-
Информация по загрузке:


