Honda Accord 2012 touch screen upgrade
Автор: PHubb
Загружено: 2023-02-18
Просмотров: 64850
Описание:
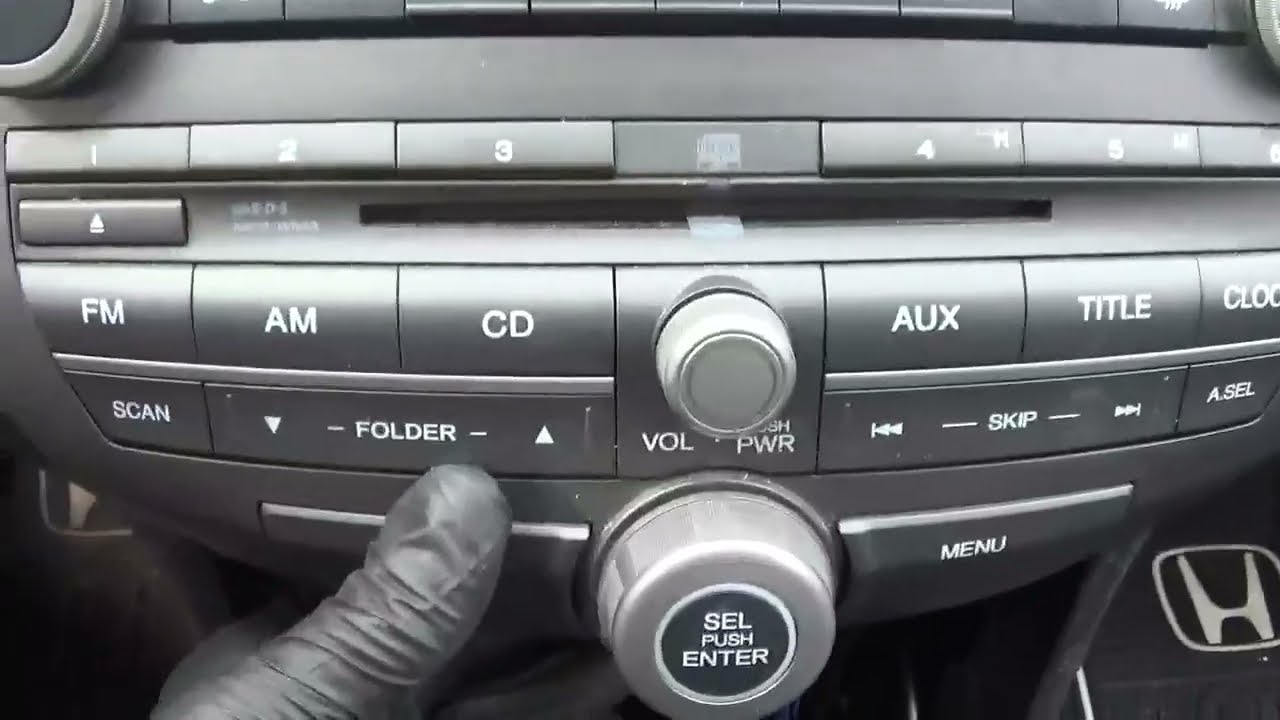
Upgrade to a touch screen on my wife's 2012 Accord. How I did it. The unit is sold by RongNan International and shipped by Amazon. In my opinion, upgrading an older car to an Android touch screen with CarPlay, AA, NAV, hands free phone, etc. is a game changer, especially for long trips. There are two types of kits for the 8th gen Accords. One package completely replaces the OEM radio. The disadvantage to that setup is loss of a pretty good AM/FM radio (SiriusXM on some units) and the CD player (which my wife still uses). The other type of install is what Biorunn sells. It involves moving a small LCD info screen down below into a storage compartment space and adds the touch screen up top. This way the OEM radio remains in the car, intact, and is still functional – best of both worlds in my opinion.
This step is HIGHLY RECOMMENDED: I set up the new unit on a bench to test it before I installed it. I used an old PC power supply - the yellow rail is 12V, the black rail is ground, and the red rail is 5V. The power cable for the head unit uses the same color wires. I connected the yellow wire to 12V (constant), the black wire to ground, and the red ACC wire to switched 12V. As soon as I turned on the PC power supply, it started right up and I was able to test the basic functionality (Bluetooth, CarPlay, music, NAV, and video. It all worked flawlessly. At this point I felt confident installing it in my wife’s 2012 Accord.
The theory of this installation is not all that complex, but to have success, a well thought out plan of execution is necessary. There are several videos that show various people doing this install. I found all of them to be only partially helpful. Most left out the final steps of the installation.
First I popped out the little plug on the shifter housing (auto trans) which exposes a slot which when depressed unlocks the shifter so it can be moved. Don’t forget to engage the parking brake when you do this. I used plastic trim tools to remove the center console insert and dash board trim pieces. I then unscrewed and removed the storage cubby after which I unscrewed four screws and popped out the OEM radio. At this point you’re ready to move the small LCD screen down to the storage (cubby) space below. This requires completely removing it from its original housing and transferring it to the new housing which is provided in the kit. The storage cubby is not reused. I also bought a double USB socket and put it in the new housing for the LCD screen. That way it would be easier and look cleaner when connecting a USB device (instead of USB dangling in the glove box).
Next was figuring out if the cables provided are the correct ones for your OEM radio. In this setup the new touch screen head unit is providing pre-amp power to the OEM radio through its AUX input. The main amp and speaker output is still provided by the OEM radio. The main power cable (usually orange or gray wires) fits and works. There’s also an extension cable that connects to the LCD screen which is now down below. The AUX cable is another matter. If your OEM radio has a certain type of AUX connector on back then the smaller gray wire harness with two RCA connectors provided will work. If not (mine wasn’t) you have to go to plan B which meant running the long 1/8th to RCA cable from the rear of the center console up to the new head unit. These Accords have a 1/8th audio IN jack and a USB audio plug at the rear of the console. To make a clean installation, I had to remove the complete center console (not just the insert). There’s a little cover at the back of it which when popped off exposes the OEM AUX wiring and screws. I took it into my workshop and drilled a small hole to access the 1/8th plug from below. I then followed some OEM wiring back up to the front. I also had a rear view (backup) camera and ran its long (yellow) RCA video cable up to the front at the same time. I was then able to reinstall the center console outer shell, but not the inner insert yet. The kit came with a small half shell cover which screwed onto the back of the new head unit (5 screws). At this point I transferred two metal clips from the OEM small LCD screen housing to that back cover. Before I put the OEM radio back in, I connected a reverse video trigger wire, the two RCA plugs (audio OUT L and audio OUT R) which go to the long AUX IN cable under the console. There’s also a GPS antenna, two USB cables, a WIFI antenna cable for 2.4 HZ signal, and a FM antenna (NOT included) which I purchased separately. I then put the GPS and FM antennas all the way forward into the cavity and taped them to plastic heater ducts. I connected the main power plug. I then re-installed the OEM radio (four screws) and dash molding. Next I connected the extension cable to the small LCD screen and the USB cables to the socket. I installed the touch screen by lining it up in its slots and pushing it in. When I started the car the new touch screen came to life & works.
Повторяем попытку...
Доступные форматы для скачивания:
Скачать видео
-
Информация по загрузке:


