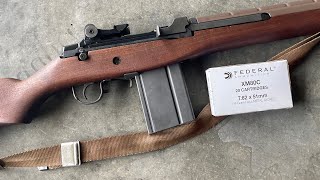
Installing a Rail on the M1A / M14
Автор: Hi-Lux Optics
Загружено: 2024-05-17
Просмотров: 6839
Описание:
The M14 and M1A rifles do not normally have a rail. While that can present a problem when trying to mount a scope, it's an easy problem to solve. Follow along as I install the M1A/M14 rail kit on a brand new Springfield M1A rifle.
For a more detailed article (with pictures and written descriptions): https://hi-luxoptics.com/blogs/furthe...
00:00 Introduction
A quick look at the rifle, the kit parts, and the needed tools.
This rifle is rather new, and everything has an incredibly tight fit. There's going to be some hammering going on.
01:46 Remove Clip Guide
The rail kit uses the mounting dovetail that is normally taken up by a clip guide. Removing this clip guide will require you to disassemble the rifle in order to hammer out the pin from below.
1. Remove the trigger group. Pull back on the trigger guard (somewhat like a lever on a lever action rifle), then lift away from the stock. The trigger group should slide out.
2. Remove the stock from the receiver/barrel.
3. Find the hole on the inside of the receiver.
4. Hammer out the pin. I used a 5/64" punch to knock it out, driven by a light tack hammer.
5. Remove the clip guide. Hammer it out to the left.
6. Reassemble the rifle.
05:55 Install Bracket Rear
The space formerly occupied by the clip guide will be filled by the rear attachment point for the bracket. It should slide in just how the clip guide slid out. Depending on the tightness of the dovetail, this may involve some amount of hammering.
The clip guide replacement has two set screws on top. Once the guide is centered, tighten the two set screws to lock it in place. Loctite is optional, but recommended if you'll be keeping the bracket on for a long time.
The rear support has the ability to adjust external windage even after it has been installed. Two set screws (one on the left, one on the right) can be alternatively tightened or loosened. These will in turn move the attachment point for the rail itself, angling the rear of the rail left or right as needed.
07:26 Install Bracket Front
The front of the rail attaches to a truly strange-looking bracket. It's built specifically for the architecture of the M1A/M14 receiver, and has some protrusions meant to fit into divots on the receiver. One screw hole on the left of the receiver will line up with a hole on the side of the bracket, and a bolt will be used to attach the two. Two set screws in the bracket enable it to be snugged up against the rifle, or pushed a little bit to correct windage.
08:51 Install Rail
With two attachment points in place, it's time to install the rail.
1. Set the flat spring atop the brackets. This spring has a divot that should go toward the front. The oddly-shaped spring is meant to guide the case as it ejects out of the rifle, rather than just letting it bounce against the bottom of the rail.
2. Set the rail atop the spring. The holes should line up.
3. Install the two screws.
Hi-Lux On Social Media:
► Like on Facebook: / leatherwoodhiluxoptics
► Follow on Instagram: / leatherwoodoptics
► Subscribe on Youtube: / hiluxinc
https://www.hi-luxoptics.com
Повторяем попытку...

Доступные форматы для скачивания:
Скачать видео
-
Информация по загрузке: